PX4 Stock Autopilot in HITL Simulation with UAV Dynamics Modeled in Simulink
This example shows how to use the UAV Toolbox Support Package for PX4® Autopilots to design UAV Dynamics in Simulink® and verify them by using the PX4 Stock Autopilot in HITL mode.
You can design the UAV Dynamics in Simulink, simulate sensor values, and use these simulations to communicate with the Autopilot in HITL mode instead of relying on third-party simulators.
Prerequisites
If you are new to Simulink, watch the Simulink Quick Start video.
Configure and set up PX4 Autopilot in HITL mode. For more information, see Setting Up PX4 Autopilot in Hardware-in-the-Loop (HITL) Mode from QGroundControl.
Required Third-Party Software This example requires this third-party software:
Required Hardware To run this example, you will need the following hardware:
PX4 Autopilot flight controller
Micro USB (Universal Serial Bus) type-B cable
Micro-SD card
Make Hardware Connections and Set Up the PX4 Autopilot in HITL Mode
The diagram below illustrates the HITL setup and the physical communication between various modules.
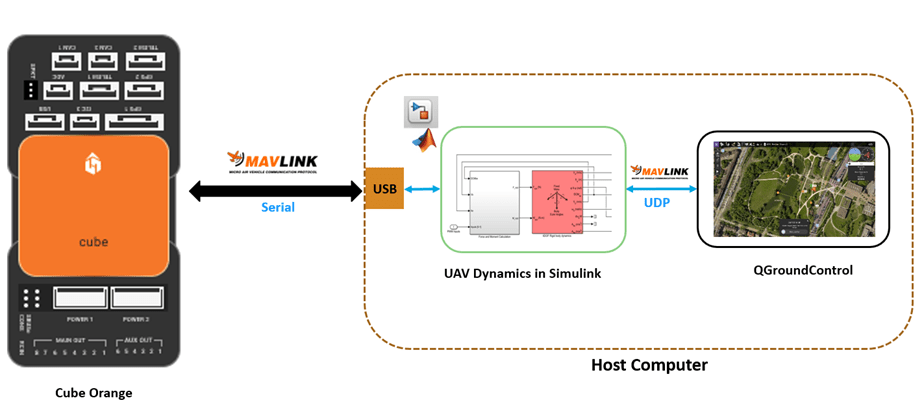
1. Connect your PX4 Autopilot board to the host computer using the USB cable.
2. Ensure that you have configured the PX4 Autopilot board in HITL mode as documented in Setting Up PX4 Autopilot in Hardware-in-the-Loop (HITL) Mode from QGroundControl.
Open MATLAB Project and Controller and UAV Dynamics Model
The support package includes an example project having the PX4 controller and the UAV to follow the mission set in the QGroundControl (QGC).
1. Open MATLAB.
2. Open the example MATLAB project by executing this command at the MATLAB command prompt:
openExample('px4/PX4StockAutopilotHITLUAVDynamicsExample')3. In the Project Shortcuts tab, click Open UAV Dynamics to launch the Simulink UAV Dynamics model named UAV_Dynamics_Autopilot_Communication.


4. Ensure that the COM ports are set in the MAVLink Bridge Source and MAVLink Bridge Sink blocks. To set the COM port:
Double-click the block to open the Block Parameters dialog box and then specify the value for the Serial Port (Specify manually) parameter.
Upload Firmware to PX4 Autopilot
Use QGC to upload the latest stable firmware. For steps to upload the firmware, see Loading Firmware.
Run the UAV Dynamics Model, Upload Mission from QGroundControl, and Fly the UAV
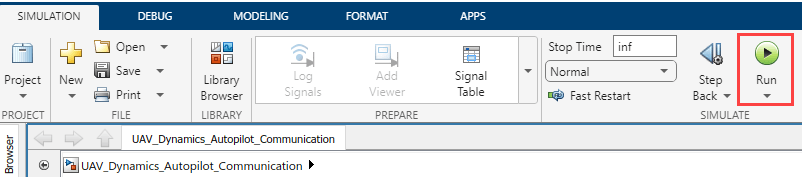
1. In the Simulink toolstrip of the Plant model (UAV_Dynamics_Autopilot_Communication), on the Simulation tab, click Run to simulate the model.
2. Configure the actuators in QGC. For more information, see Configure and Assign Actuators in QGC.

3. Navigate to the Plan View.

4. Create a mission. For information on creating a mission, see Plan View.
After you create a mission, it is visible in QGC.
5. Click the Upload button in the QGC interface to upload the mission from QGroundControl.
6. Navigate to Fly View to view the uploaded mission.
7. Start the Mission in QGC. The UAV should follow the mission path.
