axis
Set axis limits and aspect ratios
Description
Set Limits and Aspect Ratio
axis( specifies the limits
for the current axes. Specify the limits as vector of four, six, or eight
elements.limits)
axis uses a predefined style
to set the limits and scaling. For example, specify the style as
styleequal to use equal data unit lengths along each
axis.
axis sets whether MATLAB® automatically chooses the limits or not. Specify the mode as
modemanual, auto, or one of the
semiautomatic options, such as 'auto x'.
axis , where
ydirectionydirection is ij, places the origin at
the upper left corner of the axes. The y values increase
from top to bottom. The default for ydirection is
xy, which places the origin at the lower left corner. The
y values increase from bottom to top.
axis , where
visibilityvisibility is off, turns off the
display of the axes background. Plots in the axes still display. The default for
visibility is on, which displays the
axes background.
Examples
Plot the sine function.
x = linspace(0,2*pi);
y = sin(x);
plot(x,y,'-o')
Change the axis limits so that the x-axis ranges from to and the y-axis ranges from -1.5 to 1.5.
axis([0 2*pi -1.5 1.5])

Create a stairstep plot, and use the axis padded command to add a margin of padding between the plot and the plot box.
x = 0:12;
y = sin(x);
stairs(x,y)
axis padded
Create a plot. Set the limits for the x-axis and set the minimum y-axis limit. Use an automatically calculated value for the maximum y-axis limit.
x = linspace(-10,10,200);
y = sin(4*x)./exp(.1*x);
plot(x,y)
axis([-10 10 0 inf])

Call the tiledlayout function to create a 2-by-1 tiled chart layout. Call the nexttile function to create the axes objects ax1 and ax2. Plot data in each axes. Then set the axis limits for both axes to the same values.
tiledlayout(2,1)
x1 = linspace(0,10,100);
y1 = sin(x1);
ax1 = nexttile;
plot(ax1,x1,y1)

x2 = linspace(0,5,100);
y2 = sin(x2);
ax2 = nexttile;
plot(ax2,x2,y2)

axis([ax1 ax2],[0 10 -1 1])

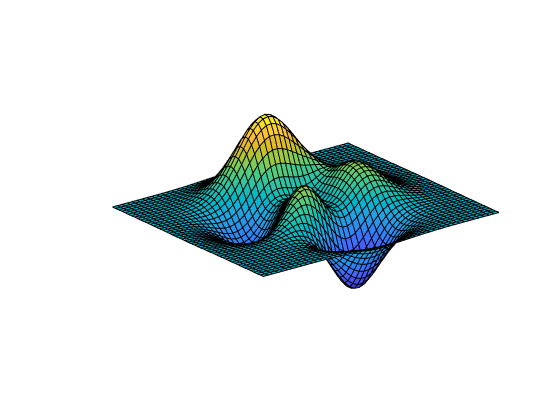
Plot a surface without displaying the axes lines and background.
surf(peaks)
axis off
Plot a surface. Set the axis limits to equal the range of the data so that the plot extends to the edges of the axes.
surf(peaks)
axis tight
Return the values of the current axis limits.
l = axis
l = 1×6

    1.0000   49.0000    1.0000   49.0000   -6.5466    8.0752
Create a checkerboard plot and change the direction of the coordinate system.
First, create the plot using the summer colormap. By default, the x values increase from left to right and the y values increase from bottom to top.
C = eye(10);
pcolor(C)
colormap summer
Reverse the coordinate system so that the y values increase from top to bottom.
axis ij
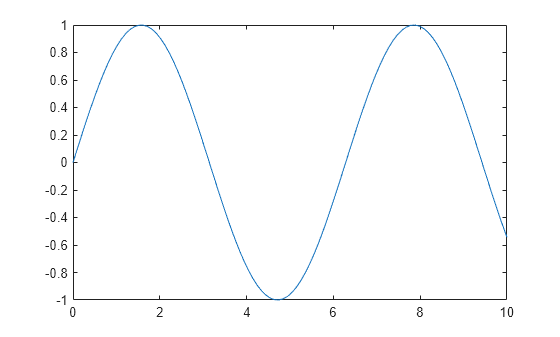
Plot a sine wave.
x = linspace(0,10);
y = sin(x);
plot(x,y)

Add another sine wave to the axes using hold on. Keep the current axis limits by setting the limits mode to manual.
y2 = 2*sin(x);
hold on
axis manual
plot(x,y2)
hold off

If you want the axes to choose the appropriate limits, set the limits mode back to automatic.
axis auto
Input Arguments
Axis limits, specified as a vector of four, six, or eight elements.
For Cartesian axes, specify the limits in one of these forms:
[xmin xmax ymin ymax]— Set the x-axis limits to range fromxmintoxmax. Set the y-axis limits to range fromymintoymax.[xmin xmax ymin ymax zmin zmax]— Also set the z-axis limits to range fromzmintozmax.[xmin xmax ymin ymax zmin zmax cmin cmax]— Also set the color limits.cminis the data value that corresponds to the first color in the colormap.cmaxis the data value that corresponds to the last color in the colormap.
The XLim, YLim, ZLim, and
CLim properties for the
Axes object store the limit
values.
For polar axes, specify the limits in this form:
[thetamin thetamax rmin rmax]— Set the theta-axis limits to range fromthetamintothetamax. Set the r-axis limits to range fromrmintormax.
The ThetaLim and
RLim properties
for the PolarAxes object store the limit
values.
For partially automatic limits, use inf or -inf for
the limits you want the axes to choose automatically. For example, axis([-inf
10 0 inf]) lets the axes choose the appropriate minimum x-axis
limit and maximum y-axis limit. It uses the specified
values for the maximum x-axis limit and minimum y-axis
limit.
Note
If the x-axis, y-axis,
or z-axis displays categorical, datetime, or
duration values, then use the xlim, ylim, and zlim functions
to set the limits instead.
Example: axis([0 1 0 1])
Example: axis([0 1 0 1 0 1])
Example: axis([0 inf 0 inf])
Manual, automatic, or semiautomatic selection of axis limits, specified as one of the values
in this table. All of the auto mode values use the
tickaligned
style to calculate the limits for the particular axis
or set of axes you specify.
| Value | Description | Axes Properties That Change |
|---|---|---|
manual | Freeze all axis limits at their current values. | Sets XLimMode,
YLimMode, and
ZLimMode to
'manual'. If you are working with
polar axes, then this option sets
ThetaLimMode and
RLimMode to
'manual'. |
auto | Automatically choose all axis limits. | Sets XLimMode,
YLimMode, and
ZLimMode to
'auto'. If you are working with
polar axes, then this option sets
ThetaLimMode and
RLimMode to
'auto'. |
'auto x' | Automatically choose the x-axis limits. | Sets XLimMode to
'auto'. |
'auto y' | Automatically choose the y-axis limits. | Sets YLimMode to
'auto'. |
'auto z' | Automatically choose the z-axis limits. | Sets ZLimMode to
'auto'. |
'auto xy' | Automatically choose the x-axis and y-axis limits. | Sets XLimMode and
YLimMode to
'auto'. |
'auto xz' | Automatically choose the x-axis and z-axis limits. | Sets XLimMode and
ZLimMode to
'auto'. |
'auto yz' | Automatically choose the y-axis and z-axis limits. | Sets YLimMode and
ZLimMode to
'auto'. |
Note
You cannot use these options with polar axes.
Axis limits and scaling, specified as one of these values.
| Value | Description | Axes Properties That Change |
|---|---|---|
tickaligned | In general, align the edges of the axes box with the tick marks that are closest to your data without excluding any data. The appearance might vary depending on the type of data you plot and the type of chart you create. |
|
tight | Fit the axes box tightly around the data by setting the axis limits equal to the range of the data. |
|
padded | Fit the axes box around the data with a thin margin of padding on all sides. The width of the margin is approximately 7% of your data range. |
|
equal | Use the same length for the data units along each axis.
| Sets This style disables the default “stretch-to-fill” behavior. |
image | Use the same length for the data units along each axis and fit the axes box tightly around the data.
| Sets This style disables the default “stretch-to-fill” behavior. |
square | Use axis lines with equal lengths. Adjust the increments between data units accordingly. | Sets This style disables the default “stretch-to-fill” behavior. |
fill | Enable the “stretch-to-fill” behavior (the default). The lengths of each axis
line fill the position rectangle defined in the
Position property of the axes. | Sets |
vis3d | Freeze the aspect ratio properties.
| Sets |
normal | Restore the default behavior. | Sets |
For more information on the plot box aspect ratio and the data
aspect ratio, see the PlotBoxAspectRatio and DataAspectRatio properties.
Note
You cannot use these options with polar axes, except for the axis
tight and axis normal commands.
y-axis direction, specified as one of these values:
xy— Default direction. For axes in a 2-D view, the y-axis is vertical with values increasing from bottom to top.ij— Reverse direction. For axes in a 2-D view, the y-axis is vertical with values increasing from top to bottom.
Note
You cannot use these options with polar axes.
Axes lines and background visibility, specified as any of these values:
"on"or"off"— A value of"on"displays the axes lines and background, and"off"hides them. You can also specify the character vectors'on'or'off'.Numeric or logical
1(true) or0(false) — A value of1ortruedisplays the axes lines and background, and0orfalsehides them. (since R2024a)A
matlab.lang.OnOffSwitchStatevalue — A value ofmatlab.lang.OnOffSwitchState.ondisplays the axes lines and background, andmatlab.lang.OnOffSwitchState.offhides them. (since R2024a)
Note
Use parentheses to specify 1, 0,
true, false, or an
OnOffSwitchState value. For example,
axis(0) and axis(false) hide
the axes.
Parentheses are optional for the values "on" and
"off". For example, axis off
hides the axes.
Specifying the visibility sets the Visible property of the Axes object or PolarAxes
object to the specified value.
Target axes, specified as one or more axes. You can specify Axes objects
or PolarAxes objects. If you do not specify the
axes, then axis sets the limits for the current
axes (gca).
When you specify the axes, use single quotes around other input arguments that are character vectors.
Example: axis(ax,'tight')
Example: axis(ax,limits)
Example: axis(ax,'manual')
Output Arguments
Current limit values, returned as a four-element or six-element vector.
For Cartesian axes in a 2-D view,
limis of the form[xmin xmax ymin ymax]. For axes in a 3-D view,limis of the form[xmin xmax ymin ymax zmin zmax]. TheXLim,YLim, andZLimproperties for theAxesobject store the limit values.For polar axes,
limis of the form[thetamin thetamax rmin rmax]. TheThetaLimandRLimproperties for thePolarAxesobject store the limit values.
Tips
You can combine multiple input arguments together, for example,
axis image ij. The options are evaluated from left to right. Subsequent options can overwrite properties set by prior ones.If axes do not exist, the
axisfunction creates them.Use
hold onto keep plotting functions from overriding preset axis limits.
Version History
Introduced before R2006aThis syntax, which returns the axis limit selection mode (m),
visibility (v), and y-axis direction
(d) is no longer supported and returns an error.
[m,v,d] = axis('state')
You can get the same information by querying these Axes properties.
This change was announced in R2015a.
Display or hide the axes by specifying the visibility input
argument as a logical value or as a matlab.lang.OnOffSwitchState value.
The values 1 and true are equivalent to
"on", and 0 and false
are equivalent to "off".
The values "on" and "off" are still
supported.
See Also
Functions
Properties
MATLAB Command
You clicked a link that corresponds to this MATLAB command:
Run the command by entering it in the MATLAB Command Window. Web browsers do not support MATLAB commands.
Website auswählen
Wählen Sie eine Website aus, um übersetzte Inhalte (sofern verfügbar) sowie lokale Veranstaltungen und Angebote anzuzeigen. Auf der Grundlage Ihres Standorts empfehlen wir Ihnen die folgende Auswahl: .
Sie können auch eine Website aus der folgenden Liste auswählen:
So erhalten Sie die bestmögliche Leistung auf der Website
Wählen Sie für die bestmögliche Website-Leistung die Website für China (auf Chinesisch oder Englisch). Andere landesspezifische Websites von MathWorks sind für Besuche von Ihrem Standort aus nicht optimiert.
Amerika
- América Latina (Español)
- Canada (English)
- United States (English)
Europa
- Belgium (English)
- Denmark (English)
- Deutschland (Deutsch)
- España (Español)
- Finland (English)
- France (Français)
- Ireland (English)
- Italia (Italiano)
- Luxembourg (English)
- Netherlands (English)
- Norway (English)
- Österreich (Deutsch)
- Portugal (English)
- Sweden (English)
- Switzerland
- United Kingdom (English)