Simulate RoadRunner Scenarios with Actors Modeled in MATLAB
You can use a MATLAB® System object™ to model the behavior of an actor in RoadRunner Scenario. A System object is a specialized MATLAB object designed specifically for implementing and simulating dynamic systems with inputs that change over time. For more information, see What Are System Objects?
In an actor behavior modeled using a MATLAB
System object, you can retrieve run-time actor attributes from a scenario and update their
values to move an actor around. For example, you can get the velocity of a vehicle by using
the getAttribute
function, and then increase the velocity until the vehicle catches up to another moving
vehicle.
This page contains examples that highlight different actor behaviors modeled in MATLAB. To simulate the actor behavior created in MATLAB, you must connect RoadRunner and MATLAB. For more information, see Connect MATLAB and RoadRunner to Control and Analyze Simulations.
Model Actor Behavior with Accelerated Motion
Model Actor Behavior with Accelerated Motion
This example shows how to create a MATLAB System object that models a vehicle with accelerated motion.
This example assumes that:
You have a RoadRunner license and the product is installed. For more information, see Install and Activate RoadRunner (RoadRunner).
You have a RoadRunner Scenario license and the product is installed.
Set Up Cosimulation Environment
Start RoadRunner application interactively by using the roadrunnerSetup function. When the function opens a dialog box, specify the location of the RoadRunner installation folder and project folder.
rrApp = roadrunnerSetup;
Add these files to the appropriate folders within your RoadRunner project:
Accelerated_Motion.rrscene— Scene file for the example.AccMotion.rrscenario— Scenario file built on the scene,Accelerated_Motion.rrscene.Acc.rrbehavior.rrmeta— Behavior asset file that links behavior in theAcceleratedMotion.mMATLAB System object to a vehicle in the scenario.
copyfile("Accelerated_Motion.rrscene",fullfile(rrApp.status.Project.Filename,"Scenes"));
copyfile("AccMotion.rrscenario",fullfile(rrApp.status.Project.Filename,"Scenarios"));
copyfile("Acc.rrbehavior.rrmeta",fullfile(rrApp.status.Project.Filename,"Assets","Behaviors"));
Open the scene Accelerated_Motion.rrscene.
openScene(rrApp,"Accelerated_Motion");Open the scenario AccMotion.rrscenario.
openScenario(rrApp,"AccMotion");Connect to the RoadRunner Scenario server to enable cosimulation by using the createSimulation function.
ss = createSimulation(rrApp);
Connection status: 1
Connected to RoadRunner Scenario server on localhost:54322, with client id {ef25b683-8307-446d-980a-28ed2c9f0254}
Start the simulation.
set(ss,"SimulationCommand","Start");
MATLAB System object for Actor with Accelerated Motion
The programming logic that enables a vehicle actor to display accelerated motion
is implemented by MATLAB
System object
AcceleratedMotion. Hence, this MATLAB
System object represents the behavior of the actor in a RoadRunner Scenario. For more information about the working of a MATLAB
System object, see Create System Objects.
![]() MATLAB
System object Code for Actor with Accelerated Motion
MATLAB
System object Code for Actor with Accelerated Motion
The main code snippets in AcceleratedMotion are explained
below:
To make the MATLAB System object execute in sync with the scenario, set its sample time to the step size of the scenario.
Find the
ScenarioSimulationobject that corresponds to the scenario opened in RoadRunner by using theSimulink.ScenarioSimulation.findfunction. Get the step size of the scenario and assign it to the sample time of the objectobj.function st = getSampleTimeImpl(obj) obj.mScenarioSimulationHdl = ... Simulink.ScenarioSimulation.find("ScenarioSimulation"); obj.mStepSize = obj.mScenarioSimulationHdl.get("StepSize"); st = createSampleTime(obj, ... "Type","Discrete","SampleTime",obj.mStepSize); end
Retrieve the
ActorSimulationobject to which the MATLAB System object is attached.In
setupImpl, call theSimulink.ScenarioSimulation.findfunction to find theActorSimulationobject to which MATLAB System objectobjis attached. During scenario simulation, MATLAB calls the functionsetupImplonly once, at the start. For more information about working with a MATLAB System object, see Create System Objects.obj.mActorSimulationHdl = Simulink.ScenarioSimulation.find( ... "ActorSimulation","SystemObject",obj);
Retrieve and store the current values of pose and velocity of the actor in the scenario by using the
getAttributefunction.obj.mActor.pose = ... obj.mActorSimulationHdl.getAttribute("Pose"); obj.mActor.velocity = ... obj.mActorSimulationHdl.getAttribute("Velocity")
Calculate the simulation time elapsed since the last step to update the distance the vehicle moves in this time.
During scenario simulation, MATLAB calls the
stepImplfunction at each time step. ThestepImplfunction contains the programming logic that enables the behavior of the vehicle actor. In thestepImplfunction, calculate the simulation time elapsed since the last step. Then, assign the current time to the last simulation time so that the elapsed time can be calculated in the next iteration of thestepImplfunction.currentTime = obj.getCurrentTime; elapsedTime = currentTime - obj.mLastTime; obj.mLastTime = currentTime;
Get the pose and velocity of the actor in the previous time step.
velocity = obj.mActor.velocity; pose = obj.mActor.pose;
Calculate the current pose to move the vehicle forward.
If the simulation time is less than 3 seconds, update the translation component of the actor pose matrix to accommodate the distance that the vehicle traveled in the elapsed time. The distance traveled in the
x-direction,pose(1,4), is thex-component of the current velocity multiplied by the elapsed time. The distance traveled in they-direction,pose(2,4), is they-component of the current velocity multiplied by the elapsed time, and so on.If the simulation time is more than 3 seconds, then also multiply the translation component of the actor pose matrix by a factor of 3 to accelerate the car.
For more information about the actor pose matrix, see What Is a RoadRunner Pose Matrix?
if(currentTime < 3.0) pose(1,4) = pose(1,4) + velocity(1) * elapsedTime; pose(2,4) = pose(2,4) + velocity(2) * elapsedTime; pose(3,4) = pose(3,4) + velocity(3) * elapsedTime; else pose(1,4) = pose(1,4) + velocity(1) * 3 * elapsedTime; pose(2,4) = pose(2,4) + velocity(2) * 3 * elapsedTime; pose(3,4) = pose(3,4) + velocity(3) * 3 * elapsedTime;
Store the current pose.
Update the
obj.mActor.poseproperty of the MATLAB System object to the new value so that it holds the baseline pose to further update in future iterations.obj.mActor.pose = pose;
Set the pose attribute of the vehicle to the new pose.
Write the new pose to the vehicle in the scenario by using the
setAttributefunction. Updating the pose moves the vehicle in the scenario accordingly.obj.mActorSimulationHdl.setAttribute("Pose",pose);
Once you write a MATLAB System object, you must also assign it to an actor in the RoadRunner Scenario interface to complete the association. For more information about associating an actor behavior in RoadRunner, see Associate Actor Behavior in RoadRunner and Simulate Scenario. Once the association is complete, you can simulate the scenario and view the movement of the vehicle actor in RoadRunner Scenario.
Model Actor Behavior with Path-Following Action
Model Actor Behavior with Path-Following Action
This example shows how to create a MATLAB System object for an actor group comprising of a truck and a trailer. The System object hTruckWithTrailer reads the pose and velocity of the truck (parent) and updates the movement of the actor group in such a way that the child always remains at a constant distance behind the parent on the prepared path.
This example assumes that:
You have a RoadRunner license and the product is installed. For more information, see Install and Activate RoadRunner (RoadRunner).
You have a RoadRunner Scenario license and the product is installed.
Set Up Cosimulation Environment
Start RoadRunner application interactively by using the roadrunnerSetup function. When the function opens a dialog box, specify the location of the RoadRunner installation folder and project folder.
rrApp = roadrunnerSetup;
Add these files to the appropriate folders within your RoadRunner project.
Intersection.rrscene— Scene file for the example.TruckTrailerGroup.rrscenario— Scenario built on the scene file,Intersection.rrscene.TruckTrailerGroup.rrbehavior.rrmeta— Behavior asset file that links behavior in thehTruckWithTrailer.mMATLAB System object to a vehicle in the scenario.
copyfile("Intersection.rrscene",fullfile ... (rrApp.status.Project.Filename,"Scenes")); copyfile("TruckTrailerGroup.rrscenario",fullfile ... (rrApp.status.Project.Filename,"Scenarios")); copyfile("TruckTrailerGroup.rrbehavior.rrmeta",fullfile ... (rrApp.status.Project.Filename,"Assets","Behaviors"));
Open the scene Intersection.rrscene.
openScene(rrApp,"Intersection");Open the scenario TruckTrailerGroup.rrscenario
openScenario(rrApp,"TruckTrailerGroup");Connect to the RoadRunner Scenario server to enable cosimulation by using the createSimulation function.
ss = createSimulation(rrApp);
Connection status: 1
Connected to RoadRunner Scenario server on localhost:54322, with client id {5f2d8824-0e49-40ed-b47d-beb98f771c12}
Start the simulation.
set(ss,"SimulationCommand","Start");
MATLAB System object for Actor with Path-Following Action
The programming logic that enables a vehicle actor to display accelerated motion
is implemented by MATLAB
System object
hTruckWithTrailer.
![]() MATLAB
System object Code for Actor with Path-Following Action
MATLAB
System object Code for Actor with Path-Following Action
The main code snippets in hTruckWithTrailer are explained
below:
Set the values of the target speed and target acceleration as public properties. If required, you can change the values at a later time.
properties (Access = public) TargetSpeed = 17.9; TargetAccel = 10.0; endSet the sample time to
.02seconds which is also the step size of the scenario. If required, you can change the value later.function st = getSampleTimeImpl(obj) st = createSampleTime( ... obj,"Type","Discrete","SampleTime",0.02); end
In the
resetImplfunction, get the scenario and actor to which the MATLAB System object is attached. Get the pose of the actor as well. Set the initial values for these object properties:mLastTime— Simulation time at the occurrence of the previous iteration, which is used to calculate the elapsed time. Set the initial value to0.speed— Current speed of the vehicle. Set the initial value to0.currPos— Distance that an actor has traveled along its current path segment, where a path segment is the section between two consecutive waypoints on a path. Set the initial value to0.mFirstStep— Indicates whether the current iteration is the first time step for the vehicle.
Since the
resetImplfunction performs initialization at the start of a simulation, set its initial value totrue.resetImpl(obj) obj.mActorSimulationHdl = ... Simulink.ScenarioSimulation.find( ... "ActorSimulation","SystemObject",obj); obj.mScenarioSimObj = ... Simulink.ScenarioSimulation.find( ... "ScenarioSimulation","SystemObject",obj); obj.mLastTime = 0; obj.mActor.pose = ... obj.mActorSimulationHdl.getAttribute("Pose"); obj.mActor.actorModel = ... obj.mActorSimulationHdl.get("ActorModel"); obj.mActor.speed = 0.0; obj.mActor.currPos = 0.0; obj.mFirstStep = true; endGet the target path and the number of points in the path the actor follows.
During scenario simulation, MATLAB calls the
stepImplfunction at each time step. In thestepImplfunction, get the path action structure of the path that the truck and trailer follow by using thegetActionfunction. From the path action structure, get the target path and the total number of points on the path. The target path is a set of 3D coordinates representing the target path, returned as an N-by-3 array where N is the total number of points on the path. For more information, see PathAction structure. The current point,currPt, is the numerical index of a waypoint in the array representing the target path. Set the initial value ofcurrPtto1.path_action = obj.mActorSimulationHdl.getAction("PathAction"); if(~isempty(path_action)) obj.mActor.path = path_action.PathTarget.Path; obj.mActor.numPts = path_action.PathTarget.NumPoints; obj.mActor.currPt = 1; end
If you customized the scenario by adding a change speed action, get the change speed action.
This example does not have a change speed action. However, if you choose to customize the
trailer.rrscenarioscenarioby adding a change speed action from the RoadRunner Scenario interface, then this code snippet retrieves the information in the speed change action by using thegetActionfunction. Read the speed attribute from the change speed action and assign it totgtSpeed. For more information, see Change Speed (RoadRunner Scenario).In the first step of program execution, the speed of the actor must be
0. To avoid a clash during program execution, the speed set in a change speed action from the RoadRunner Scenario interfacetgtSpeedmustbe the same as the value of the target speed propertyobj.TargetSpeedin the MATLAB System object.speedChg_action = obj.mActorSimulationHdl.getAction("SpeedAction"); if(~isempty(speedChg_action)) tgtSpeed = speedChg_action.SpeedTarget.SpeedValue; if(obj.mFirstStep) assert(isequal(obj.mActor.speed, 0)); else assert(isequal(tgtSpeed, obj.TargetSpeed)); end end
Calculate the simulation time elapsed since the last step to update the distance the vehicle moves in this time.
During scenario simulation, MATLAB calls the
stepImplfunction at each time step. ThestepImplfunction contains the programming logic that enables the behavior of the vehicle actor. In thestepImplfunction, calculate the simulation time elapsed since the last step. Then, assign the current time to the last simulation time so that the elapsed time can be calculated in the next iteration of thestepImplfunction.currentTime = obj.getCurrentTime; elapsedTime = currentTime - obj.mLastTime; obj.mLastTime = currentTime;
Update the speed of the truck until it hits the target speed and maintains the same value.
if(obj.mActor.speed < obj.TargetSpeed) obj.mActor.speed = ... obj.mActor.speed + obj.TargetAccel * elapsedTime; if (obj.mActor.speed > obj.TargetSpeed) obj.mActor.speed = obj.TargetSpeed; end end
At the target speed, calculate the absolute displacement value that the truck must achieve in one time step.
ds = obj.mActor.speed * elapsedTime;
Create a variable to hold the incremental distance calculated as the program executes.
Create the variable
totalDistto hold the incremental distance calculation as the program executes. Its initial value is the negative of the current position of the actor along a path segment because the distance already traveled must be subtracted from the total distance that is calculated by adding the length of the path segments.totalDist = -obj.mActor.currPos;
Detect the path segment in which the vehicle is currently located.
Create a
forloop to iterate over all the waypoints in the path action structure. In the loop, calculate the distance from the current point to the next point on the path. As the number of iterations increase,totalDistholds the incremental distance that the vehicle traveled since the start of the simulation. IftotalDistexceedsds, the absolute displacement expected of the truck in one time step, then you have found the required path segment. Pointspt1andpt2hold the endpoints of the path segment in which the truck is currently located. IftotalDistdoes not exceedds, then theforloop iterates until the condition is true.for i = obj.mActor.currPt : obj.mActor.numPts-1 pt1 = obj.mActor.path(i, :); pt2 = obj.mActor.path(i+1, :); prevDist = totalDist; totalDist = totalDist + norm(pt1 - pt2);Calculate the next expected path segment by finding the vector pointing from the current point to the next point on your path.
Once you find the required path segment, calculate
v, which is the vector pointing from the current point to the next point on your path. Dividing the vector by its norm produces a unit vectorunit_v, which has the same direction asvand a length of1.if(totalDist > ds) v = obj.mActor.path(i+1, :) - obj.mActor.path(i, :); obj.mActor.unit_v = (v/norm(v));Find the new position of the truck by calculating how far into the current path segment the truck needs to travel to cover the expected displacement.
Start at the beginning of segment
i, then move forward along the direction of the pathsegmentunit_vfor a distance of (ds-prevDist) units. TheprevDistvariable stores the distance that the truck has already covered before the start of this path segment.Subtracting
prevDistfromdsindicates how far into the current path segment the truck needs to travel to cover the expected displacement.The result
posis the 3D coordinates for the new position of the truck.pos = obj.mActor.path(i, :) + (ds - prevDist) * obj.mActor.unit_v;
Update the values of the current position and the numerical index of the current waypoint in the array representing the target path.
Update
currPtto the array index of the path segment where the truck is located. UpdatecurrPosto (ds-prevDist), which is the distance that an actor has traveled along its current path segment.obj.mActor.currPt = i; obj.mActor.currPos = (ds - prevDist);
Update the pose matrix.
Fill in the rotation and translation components of the pose matrix of the truck with the calculated coordinates
posto update its position in the scenario. For more information, see What Is a RoadRunner Pose Matrix?.obj.mActor.pose(1,4) = pos(1); obj.mActor.pose(2,4) = pos(2); obj.mActor.pose(3,4) = pos(3); . . . obj.mActor.pose(4, 4) = 1;
Write the updated pose of the truck to the scenario by using the
setAttributefunction.obj.mActorSimulationHdl.setAttribute("Pose",obj.mActor.pose);Calculate the position of the trailer (child) respective to the truck such that the child always remains at a fixed distance behind the truck.
Retrieve the bounding box of the truck and get the minimum corner of the bounding box. Create a position vector
yin the local coordinate system of the actor group that represents the offset from the truck (parent) to the point of attachment of the trailer.Multiply the actor pose of the truck (parent) with matrix
yto transformyfrom the local coordinate system of the actor to the world coordinate system. Then, assign the x-, y- and z- coordinates of the attachment point to the actor pose matrix of the trailer. The other values in the pose matrix values remain the same as the truck (parent).boundingBox = obj.mActor.actorModel.getAttribute("BoundingBox"); u = boundingBox.min; y =[0 2*u(2) 0 1]'; mat = obj.mActor.pose*y; trailerPose = obj.mActor.pose; trailerPose(13) = mat(1); trailerPose(14) = mat(2); trailerPose(15) = mat(3);Retrieve the trailer (child) and set its pose to the actor pose matrix by using the
setAttributefunction.child = obj.mActorSimulationHdl.getAttribute("Children"); child.setAttribute("Pose",trailerPose);
Model Actor Behavior with User-Defined Actions
This example shows how to create a MATLAB
System object for an actor that processes user-defined actions received from a scenario.
For an example of how to use such an actor, see Model Vehicle Behavior Using User-Defined Actions in MATLAB (RoadRunner Scenario). In the example,
the System object
testUDA_ML.mrepresents an ambulance that reads the custom parameters of
a user-defined action from RoadRunner Scenario and changes the pose of the ambulance.
Note
User-defined action parameters support all data types supported by RoadRunner Scenario. For more information, see Parameter Data Types (RoadRunner Scenario).
![]() MATLAB
System object Code for Custom Behavior Using User-Defined Actions
MATLAB
System object Code for Custom Behavior Using User-Defined Actions
Define a custom interface that adds a template for a user-defined action.
In the
testUDA_MLMATLAB System object, define a custom actor interface that adds a user-defined action template namedCustomDrive.The user-defined action
CustomDrivehas the custom parameters ThrottleLevel and SteeringAngle. The initial values for the parameters are empty strings. Add the custom action to the actor interface by using theaddActionfunction.function interface = getInterfaceImpl(~) import matlab.system.interface.*; interface = ActorInterface(); actionType = 'UserDefinedAction'; actionName = 'CustomDrive'; actionElements = struct("ThrottleLevel","","SteeringAngle",""); newAction = matlab.system.interface.UserDefinedAction( ... actionName,actionElements); interface.addAction(actionType, newAction); end
Define the sample time as
0.02seconds.function st = getSampleTimeImpl(obj) st = createSampleTime( ... obj,"Type","Discrete","SampleTime",0.02); end
Find the
ScenarioSimulationobject that corresponds to the scenario opened in RoadRunner.During scenario simulation, MATLAB calls the function
setupImplonly once, at the start. InsetupImpl, find theScenarioSimulationobjectsimthat corresponds to the scenario opened in RoadRunner by using theSimulink.ScenarioSimulation.findfunction.sim = Simulink.ScenarioSimulation.find("ScenarioSimulation");Find the
ActorSimulationto which the objectobjis attached.actor = sim.get("ActorSimulation","SystemObject",obj);
Extract the custom parameters of the incoming user-defined action.
In the
stepImplfunction, extract the custom parameters ThrottleLevel and SteeringAngle from the incoming user-defined action namedCustomDrive. Send out an Action Complete event to be processed by RoadRunner Scenario at the end of the action phase that uses user-defined actions.function stepImpl(obj) uda = obj.mActorHdl.getAction("UserDefinedAction","CustomDrive"); for i = 1:length(uda) obj.mThrottleLevel = eval(uda(i).Parameters.ThrottleLevel); obj.mSteeringAngle = eval(uda(i).Parameters.SteeringAngle); obj.mActorHdl.sendEvent("ActionComplete", ... uda(i).ActorAction.ActionID); end
Find the time elapsed since the previous time step.
currentTime = obj.getCurrentTime;
elapsedTime = currentTime - obj.mLastTime;
obj.mLastTime = currentTime;
Update the current pose and velocity of the vehicle by using the values of the custom parameters in the user-defined action dispatched from the scenario.
Increase the speed of the actor by a factor equaling the percentage of the applied throttle level. Update the x- and y- coordinates in the actor pose matrix by multiplying its respective translation components by the
cosandsinvalues of the steering angle. For more information, see What Is a RoadRunner Pose Matrix?pose = obj.mActorHdl.getAttribute("Pose"); maxSpeed = 50; distance = elapsedTime*obj.mThrottleLevel*maxSpeed/100; angle = deg2rad(obj.mSteeringAngle); pose(1,4) = pose(1,4) + distance*cos(angle); pose(2,4) = pose(2,4) + distance*sin(angle); obj.mActorHdl.setAttribute("Pose",pose);
Model Actor Behavior with User-Defined Events
This example shows how to create a MATLAB file for an actor that sends user-defined events to all other actors in a
scenario. For an example of how to use such an actor, see Design Vehicle Following User-Defined Events Scenario (RoadRunner Scenario). In the example,
the System object hMATLAB_Agent represents an ambulance that monitors its
distance to the white car represented by the Simulink® model
UDEVehicle_Final. When the gap reaches a value less than
3 meters, the ambulance broadcasts an event carrying the ID of
the white car. The broadcasted event reaches all other actors in the scenario, in this
case, the white car. In response, the white car moves to the adjacent lane and lets the
ambulance pass.
![]() MATLAB
System object Code for Custom Behavior Using User-Defined Events
MATLAB
System object Code for Custom Behavior Using User-Defined Events
Define a custom interface that adds a template for a user-defined event.
In the MATLAB System object, define a custom interface that adds a template for a user-defined event named
ChangeLanecontaining the ID of the actor that receives the event. Add the custom event to the actor interface by using theaddEventfunction.function interface = getInterfaceImpl(~) import matlab.system.interface.*; interface = ActorInterface(); eventType = 'UserDefinedEvent'; eventName = 'ChangeLane'; eventElements = struct('ActorID',1); newEvent = matlab.system.interface.UserDefinedEvent ... (eventName,eventElements); interface.addEvent(eventType,newEvent); end
Define the sample time as
0.02seconds.function st = getSampleTimeImpl(obj) st = createSampleTime( ... obj,"Type","Discrete","SampleTime,0.02); end
Calculate the distance the vehicle travels in the elapsed time.
dTimeUnit = dTimeUnit * obj.SpeedFactor;
Update the pose of the ambulance in each time step by adding its x -, y -, and z - coordinate distances to the distance traveled in the elapsed time.
 pose(1,4) = pose(1,4) + velocity(1) * dTimeUnit;
 pose(2,4) = pose(2,4) + velocity(2) * dTimeUnit;
 pose(3,4) = pose(3,4) + velocity(3) * dTimeUnit;
Find the actor in the scenario other than the actor to which the MATLAB System object is attached. Send a user-defined event to the vehicle to trigger the specific logic in Simulink model
UDEVehicle_Finalthat moves the other vehicle, that is, the white car ahead at each time step. When the ambulance is less than3meters behind, it broadcasts theChangeLaneevent carrying the ID of the white car.for i = 1 : length(actorsim) otherActor = actorsim(i); id = double(getAttribute(otherActor,"ID")); if(obj.HasSentEvent) attribute = struct('ActorID',10); obj.mActorSimulationHdl.sendEvent ... ("UserDefinedEvent","ChangeLane",attribute); end if (id ~= 0 && id ~= 2 && id ~=... obj.mActor.actorID && ~obj.HasSentEvent) otherPose = getAttribute(otherActor,"Pose"); distance = sqrt(abs(sum(pose(1:3,4) - ... otherPose(1:3,4)))); if (distance < 3) attribute = struct("ActorID",id); obj.mActorSimulationHdl... sendEvent("UserDefinedEvent", ... "ChangeLane",attribute); obj.HasSentEvent = true; end end end
The Simulink model
UDEVehicle_Finalthen receives the event carrying actor ID10that represents the actor behavior of the white car. The receipt of the user-defined event triggers the lane change code, present in theChangeLaneMATLAB Function block of the model.
Model Actor Behavior with Reference Pose and Curvature Calculation
This example shows how the HelperReferencePoseOnPath
MATLAB
System object calculates reference pose and curvature values for a vehicle, given a
predefined path as input, in the example Trajectory Follower with RoadRunner Scenario. The vehicle can
then emulate these reference pose and curvature values at each time step to display
smooth and uninterrupted motion in RoadRunner Scenario.
To compute reference poses and curvature,
HelperReferencePoseOnPath:
Resamples the input path to produce a new path containing waypoints at smaller, regular distances.
Determines the distance covered by the vehicle along a path section and computes interpolation weights relative to the start and end of that section.
Performs linear interpolation to calculate the reference pose and curvature by using interpolation weights.
The function stepImpl receives these inputs:
PrevVehicleInfo— Current pose of the vehicleNumTrajPoints— Number of points in the trajectoryTrajectory— n-by-3 matrix representing the trajectory, where n is the number of points in the trajectory
The stepImpl function then calculates and sends these
outputs to the Stanley Controller subsystem, which finds the
acceleration and steering angle necessary for the vehicle to reach the next reference point:
Reference pose
Reference curvature
Flag indicating if the vehicle has moved beyond the end of its path
![]() MATLAB
System object Code for Calculating Reference Pose and Curvature
MATLAB
System object Code for Calculating Reference Pose and Curvature
The MATLAB
System object
HelperReferencePoseOnPath contains these code snippets:
In
stepImpl, use the functiongenerateCurvaturesto produce a smooth path by interpolating the original waypoints of a given trajectory and calculate the curvatures between path sections defined by consecutive waypoints. The curvatures along the path dictate the steering angle of the vehicle as it moves through different path sections.function [refPose, refCurvature] = generateCurvatures(obj, ... trajectory, numTrajPoints)
Check if the input path matrix has unique waypoints. That is, verify that no two rows in the path matrix are exactly the same. Use the function
uniqueto return indices of the unique rows in the matrix. Assign only the rows associated with the unique indices to thetrajectorymatrix. Hence, thetrajectorymatrix represents the input path without any redundant waypoints.[~,uniqueId] = unique(trajectory(1:numTrajPoints,:),'rows','stable'); trajectory = trajectory(uniqueId,:);
Set the interpolation distance
interpDistanceto3. This distance decides the length of the intervals between waypoints in the final smoothed path. Calculate the distance between two consecutive waypoints by using the functiondiff. Apply the functionvecnormto the output ofdiffand find the transpose of the resultant matrix. These operations return a column vector of the Euclidean distance between each pair of consecutive waypoints. Use the functioncumsumto calculate a column vector of the cumulative distances of all path points from the starting point. Prepend the output vector with the element0to create vectorcumDistance.interpDistance = 3; cumDistance = [0, cumsum(vecnorm(diff(trajectory),2,2))'];
Calculate the number of waypoints
interpNumTrajPointsin the final, smoothed path by dividing the total cumulative distance element by the interval length of3distance units. Calculate the cumulative distances at which to place waypoints between0and the final cumulative distance in thecumDistancevector by using the functionlinspacewith the third argument representing the number of waypoints to generate.interpNumTrajPoints = round(cumDistance(end)/interpDistance); cumDistanceResample = linspace(0, cumDistance(end), ... interpNumTrajPoints);Estimate interpolated x- coordinates of the new path by using the function
interp1. This function takes as inputs the x- coordinates of the original path and the new cumulative distances represented bycumDistanceResample. Similarly, estimate the y- coordinates of the waypoints for the new path.refPose(:,1) = interp1(cumDistance,trajectory(:,1), ... cumDistanceResample); refPose(:,2) = interp1(cumDistance,trajectory(:,2), ... cumDistanceResample);
Call the function
getYawto calculate yaw angles. Convert the yaw angles returned bygetYawto radians and complete the construction of therefPosematrix that represents the new path.refYaw = getYaw(obj,refPose(:,1:2),interpNumTrajPoints); refPose = [refPose(:,1:2), refYaw]; refPose(:,3) = deg2rad(refPose(:,3));
The function
getYawcalculates the yaw angles, that is, the angles at which a vehicle orients itself to the positive x- axis at each point in the path. To calculate the yaw angles, first find the tangent vector between each pair of consecutive waypoints in the resampled path by normalizing the difference between the current point and the next point. The result is direction of the trajectory. Use the functionatan2dto calculate the angle between the tangent vector and the positive x- axis, returning the yaw angle in degrees.tangent = (nextPoint - currPoint) / ... norm(nextPoint - currPoint); tangent = tangent / norm(tangent); yaw = atan2d(tangent(2), tangent(1)); refYaw(idx-1,1) = yaw;Generate curvatures at each reference point by fitting the input reference pose, given by
refPose, to a cubic spline by using the functionsmoothPathSpline. The second argument is the reference direction of the vehicle along the path, specified as a column vector consisting of the values1and-1, where1represents forward motion and-1represents reverse motion. In this instance, every element of the column vector is 1 since the vehicle moves forward.[~,~,~,refCurvature] = smoothPathSpline(refPose, ... ones(interpNumTrajPoints,1), interpNumTrajPoints);The function
computeReferenceStateBasedOnPosecomputes the reference pose for a vehicle based on its previous pose and a set of trajectory waypoints. This function first computes the distance vectorDeltaXYbetween the start and end points of the current section. TheRXYvector represents the distance from the section start to the current position of the vehicle. Using these vectors, computeu, the normalized distance indicating traversal of the section on a scale of 0 to 1. Ifuis greater than 1, indicating that the vehicle has moved beyond the current section, then adjustuand the section index accordingly.DeltaXY = [waypoints(obj.SectionStartIndex+1,1) - ... waypoints(obj.SectionStartIndex,1), ... waypoints(obj.SectionStartIndex+1,2) - ... waypoints(obj.SectionStartIndex,2)]; RXY = [currPosePrev(1) - ... waypoints(obj.SectionStartIndex,1), currPosePrev(2) - ... waypoints(obj.SectionStartIndex,2)]; u = (RXY.*DeltaXY)/(DeltaXY.*DeltaXY); indexIncrement = ceil(u-1); if u >= 1 obj.SectionStartIndex = obj.SectionStartIndex + ... indexIncrement; u = u - indexIncrement; end
Identify consecutive sections in the path. The variables
currentSectionEndIndexandnextSectionEndIndexdefine the current section and the next section, respectively. The coordinates of the current and next waypoints areXYTarget0andXYTarget1. The yaw angles at the current and next waypoints areYawTarget0andYawTarget1. The curvatures at the end of the current path section and the next path section areCurvatureTarget1andCurvatureTarget2. Calculate weightsWeight1andWeight2based on the parameteru, which represents the position of the vehicle relative to the beginning of this path section. These weights facilitate linear interpolation of the vehicle parameters between the two path sections.currentSectionEndIndex = obj.SectionStartIndex+1; nextSectionEndIndex = currentSectionEndIndex+1; XYTarget0 = [waypoints(obj.SectionStartIndex,1), ... waypoints(obj.SectionStartIndex,2)]; XYTarget1 = [waypoints(currentSectionEndIndex,1), ... waypoints(currentSectionEndIndex,2)]; YawTarget0 = waypoints(obj.SectionStartIndex,3); YawTarget1 = waypoints(currentSectionEndIndex,3); CurvatureTarget1 = curvatures(currentSectionEndIndex); CurvatureTarget2 = curvatures(nextSectionEndIndex); Weight1 = (1-u); Weight2 = u;
Perform linear interpolation to determine the reference pose
XYTargetCurrand curvatureYawTargetCurr. Interpolate between two consecutive waypointsXYTarget0andXYTarget1, and their respective yaw anglesYawTarget0andYawTarget1using weights. Then, construct the pose matrixrefPoseCurrfrom the interpolated values. Similarly, compute reference curvaturerefCurvatureby interpolating betweenCurvatureTarget1andCurvatureTarget2using weights. The flagisGoalReachedis set tofalse, indicating that the vehicle has not reached the final waypoint yet. Repeat the process until the vehicle reaches or goes beyond the end of its path.XYTargetCurr = Weight1*XYTarget0 + Weight2*XYTarget1; YawTargetCurr = Weight1*YawTarget0 + Weight2*YawTarget1; refPoseCurr = [XYTargetCurr rad2deg(YawTargetCurr)]; refCurvature = Weight1*CurvatureTarget1 + Weight2*CurvatureTarget2; isGoalReached = false;
Model Actor Behavior with Change Speed Action Implementation
This example shows how the HelperSpeedActionAdapter
MATLAB
System object processes a Change Speed (RoadRunner Scenario)
action from RoadRunner Scenario to calculate the current speed of a vehicle in the example Trajectory Follower with RoadRunner Scenario. It is programmed
to handle all attribute combinations of the Change Speed action except the
Waypoint Time Data option for the Relative
to attribute.
The function stepImpl receives these inputs:
timestep— Time intervals at which the MATLAB System object is executedstopVehicle— Flag indicating if a vehicle has reached the end of its pathvehicleRuntime— Run-time information of the ego vehicle read by theSelf Vehicle RuntimeRoadRunner Scenario Reader blockmsgSpeedAction— Speed Change action type read by theSpeed ActionRoadRunner Scenario blockmsgAllVehicleRuntime— Run-time information of vehicles other than the ego read by theAll Actor RuntimeRoadRunner Scenario Reader block
The stepImpl function then outputs the current speed
of a vehicle.
![]() MATLAB
System object Code for Calculating Current Speed Based on Change Speed
Action
MATLAB
System object Code for Calculating Current Speed Based on Change Speed
Action
The MATLAB
System object
HelperSpeedActionAdapter contains these code snippets:
The function
stepImplcalculates the current speed of a vehicle through these two functions:updateCommand— Get and store attribute values of the Change Speed action in MATLAB. For more information, see Speed Change.updateCurrentSpeed— Update the current speed based on factors such as the speed of the reference vehicle and dynamics profile. For more information about the attributes of a Change Speed action, see Change Speed Actions (RoadRunner Scenario).
In the function
updateCommand, count the number of elements in the message queue that reads Change Speed action messages from RoadRunner Scenario. If there is more than one Change Speed action in the message queue, the last action is taken for further processing.numMsgSpeedActions = numel(msgSpeedAction); if numMsgSpeedActions > 0 % ... cmd = msgSpeedAction(end); % ... endThe function
updateCommandcontains these function calls:updateTargetSpeed(obj); updateTransitionParameters(obj);
updateTargetSpeed— Get the target speed that the vehicle must achieve at each time step. Retrieve the speed of the reference actor, if present, and update it according to the speed offset. For example, if you set Direction toSlower than, then subtract the Speed offset value from the speed of the reference vehicle, thereby producing the target speed.updateTransitionParameters— Get and store parameters related to the transition period defined by the Change Speed action. For example, if you set Dynamics Type toOver distance, then the value you enter in the Distance field dictates the transition distance that the vehicle must traverse before it achieves the target speed. For more information about transition parameters, see TransitionDynamics structure.
The function
updateTargetSpeedproceeds to run if you specified Direction as a speed-based control such asFaster than,Slower than, orSame speed as. Identify the reference actor by the ID specified in RoadRunner Scenario and retrieve its speed.if obj.Command.SpeedComparison == EnumSpeedComparison.SameAs || ... obj.Command.SpeedComparison == EnumSpeedComparison.FasterThan || ... obj.Command.SpeedComparison == EnumSpeedComparison.SlowerThan isVehiclePresent = false; actorState = obj.getActorStates(obj.Command.RefActorID); refSpeed = 0; if actorState.ActorID == obj.Command.RefActorID isVehiclePresent = true; refSpeed = norm(actorState.Velocity); end end
Equate the target speed to the reference speed if Direction is set to
Same speed
                        as
. Add or subtract the Speed Offset value from the speed of the reference vehicle if Direction is set toFaster thanorSlower than, respectively.targetSpeed = obj.Command.SpeedValue; if isVehiclePresent switch obj.Command.SpeedComparison case EnumSpeedComparison.SameAs targetSpeed = refSpeed; case EnumSpeedComparison.FasterThan targetSpeed = refSpeed + targetSpeed; case EnumSpeedComparison.SlowerThan targetSpeed = refSpeed - targetSpeed; end % ... endStore transition parameters as properties of the MATLAB System object in the function
updateTransitionParameters.case EnumDynamicsDimension.Time switch cmd.Dynamics.Shape case {EnumDynamicsShape.Linear, ... EnumDynamicsShape.Cubic} obj.TransitionRange = transitionValue; otherwise end
Make separate function calls depending on the value of the
Dimensionfield in the TransitionDynamics structure for the Speed Change Action Type as read from the scenario by the RoadRunner Scenario Reader blockSpeed Action:Rate— FunctionstepSpeedConstAccelerationcalculates speed for a vehicle in a Change Speed action phase with Dynamics Type set toWith accelerationTimeorDistance— Function call depends on the shape of the transition curve:Linear — Function
stepSpeedLinearcalculates the speed of a vehicle in a Change Speed action phase with Dynamics Profile set toLinearCubic — Function
stepSpeedCubiccalculates the speed of a vehicle in a Change Speed action phase with Dynamics Profile set toCubicStep — Target speed directly assigned to the vehicle at the end of transition time or distance in a Change Speed action phase with Dynamics Profile set to
Step
   case EnumDynamicsDimension.Rate
        stepSpeedConstAcceleration(obj, timestep);

        case EnumDynamicsDimension.Time
            transitionStepSize = timestep;
                switch cmd.Dynamics.Shape
                    case EnumDynamicsShape.Linear
                        stepSpeedLinear(obj, transitionStepSize)
                    case EnumDynamicsShape.Cubic
                        stepSpeedCubic(obj, transitionStepSize)
                    otherwise
                        obj.CurrentSpeed = obj.TargetSpeed;
                end
            otherwise
                obj.CurrentSpeed = obj.TargetSpeed;
In the function
stepSpeedConstAcceleration, the variablerequiredAccelSignrepresents the sign of the difference between the target speed and the current speed. The variableprovidedAccelSignrepresents the sign of the value entered in the Acceleration field in RoadRunner Scenario. If the sign of the provided acceleration and the actual acceleration in the scenario differ, then a diagnostic flag is set.Compute the reference speed by adding the current speed to the product of the time step and the transition acceleration. The result represents the new speed after applying acceleration for the given time step. The
stepSpeedConstAccelerationfunction checks that the current speed does not exceed the target speed before assigning to theCurrentSpeedproperty.requiredAccelSign = sign(obj.TargetSpeed - obj.CurrentSpeed); providedAccelSign = sign(obj.TransitionAcceleration); if(providedAccelSign ~= 0 && requiredAccelSign ~= 0 && ... providedAccelSign ~= requiredAccelSign && ... ~obj.DiagnosticMsgFlagForNegativeAccel) obj.DiagnosticMsgFlagForNegativeAccel = true; end tempSpeed = obj.CurrentSpeed + timestep * requiredAccelSign * abs(obj.TransitionAcceleration); if ((requiredAccelSign == -1 && ... tempSpeed < obj.TargetSpeed) || ... (requiredAccelSign == 1 && ... tempSpeed >= obj.TargetSpeed) || ... (requiredAccelSign == 0)) tempSpeed = obj.TargetSpeed; end obj.CurrentSpeed = tempSpeed;In the function
stepSpeedLinear, increment theTransitionCurrentValueproperty bystepSize. This variable tracks how much of the transition the vehicle has completed in terms of time or distance. IfTransitionCurrentValuereaches or exceedsTransitionRange, the transition is considered complete. Calculate the current speed using linear interpolation between the initial speedTransitionInitialSpeedand the target speedTargetSpeed. The interpolation factor is the ratio ofTransitionCurrentValuetoTransitionRange, representing the fraction of the transition that is completed. This calculation ensures a smooth, linear change in speed over the transition period.obj.TransitionCurrentValue = obj.TransitionCurrentValue + stepSize; if obj.TransitionCurrentValue >= obj.TransitionRange obj.CurrentSpeed = obj.TargetSpeed; return; end obj.CurrentSpeed = obj.TransitionInitialSpeed + ... (obj.TargetSpeed - obj.TransitionInitialSpeed) * ... (obj.TransitionCurrentValue / obj.TransitionRange);In the function
stepSpeedCubic, call the functionevaluateCubicto calculate current speed for the cubic profile by determining its value along a cubic curve based on the progress of a transition. These are the terms of the equation that calculates the current speed:t3— Cubic term of the polynomial. It scales with the cube ofparam, allowing for acceleration and deceleration effects.t2— Quadratic component of the polynomial.t1— Constant component of the polynomial that ensures that the transition starts frominitialVal.
Calculate the final value
valby summing these terms. This equation results in a smooth transition frominitialValtofinalVal, asparamprogresses from 0 to 1.t3 = 2.0 * (initialVal - finalVal)/(range*range*range)*param*param*param; t2 = -3 * (initialVal - finalVal)/(range*range)*param*param; t1 = initialVal; val = t1 + t2 + t3;
Associate Actor Behavior in RoadRunner
This section describes how to associate any custom behavior to your actor.
In your RoadRunner scenario, select the Library Browser and then the
Behaviorsfolder.To create a new behavior, right-click an empty space in the list of behaviors, pause on New, then select Behavior. Enter a name for your new behavior, such as
MyNewBehavior. This animation shows how to complete these steps.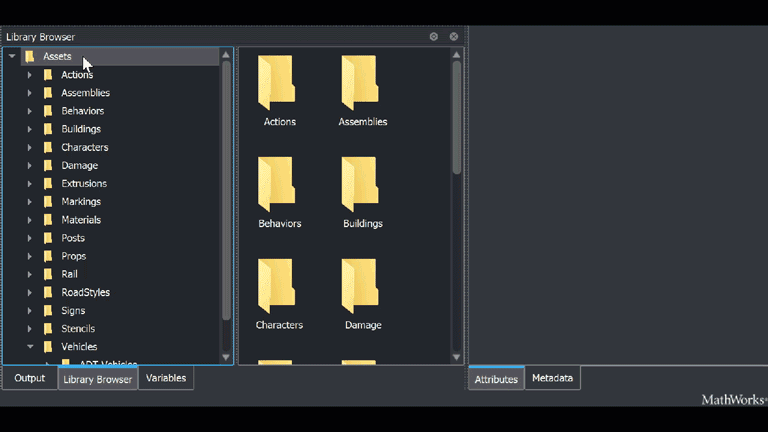
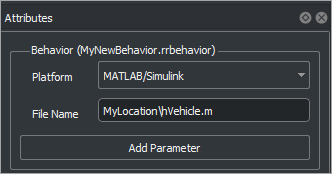
On the Attributes pane, set Platform to
MATLAB/Simulink. As the File Name, use the location of your fileAcceleratedMotion.m,hTruckWithTrailer.mortestUDA_ML.m.If your MATLAB System object file is in your working folder, you can enter the name of your file together with its extension
.m, for exampleAcceleratedMotion.m.You can also use the full path to enter the location of your file, for example
MyLocation\AcceleratedMotion.m.
This action creates a new behavior that you can attach to actors in your scenario. Rename the behavior as
MyNewBehavior.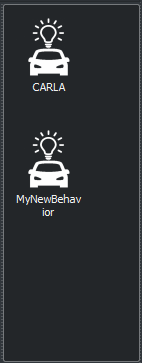
For example, add a new
CompactCarto your scenarioMyExampleScenario.To associate the MATLAB System object behavior to a RoadRunner actor, select
CompactCar. Then, in the Attributes section, in the Behavior box, addMyNewBehaviortoCompactCarby clicking and dragging the behavior icon to the box.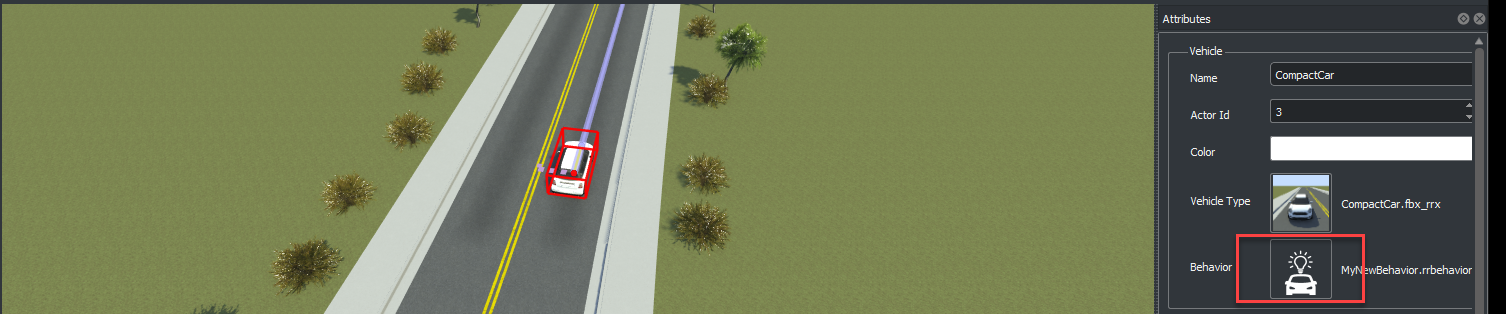
Specify the path to your RoadRunner installation folder using these commands, replacing
MyInstallationFolderwith the path to your RoadRunner installation. You need to run the commands in this step only the first time you are setting up the connection between RoadRunner and your MATLAB installation.RRInstallationFolder = "MyInstallationFolder"; s = settings; s.roadrunner.application.InstallationFolder.PersonalValue = RRInstallationFolder; s.roadrunner.application.InstallationFolder.TemporaryValue = RRInstallationFolder;Note
Specify the full path to the folder containing the
AppRoadRunner.exeexecutable. The default location of this executable on Windows® isC:\Program Files\RoadRunner R2022b\bin\win64, whereC:\Program Files\RoadRunner R2022bis your RoadRunner installation folder. The folder could be different on your computer.To open the RoadRunner project
MyRoadRunnerProjectfrom MATLAB, use this command.rrApp = roadrunner("MyProjectLocation");Open the scene
MyExampleScene.openScene(rrApp,"MyExampleScene");Open the scenario
MyExampleScenario.openScenario(rrApp,"MyExampleScenario");Get the simulation object to control simulation from MATLAB.
rrSim = createSimulation(rrApp);
Start the simulation from the command line.
set(rrSim,"SimulationCommand","Start");
Tip
When debugging cosimulations using the MATLAB or Simulink® debugger, the simulation might time out. Check the simulation timeout setting using this code.
By default, the simulation times out after 300 seconds, or 5 minutes. If you expect the simulation to take more than 5 minutes between simulation steps, set a higher timeout value using this code, which sets the timeout to 600 seconds (10 minutes) in the current MATLAB session.s = settings; s.roadrunner.application.Timeout.ActiveValue
s = settings;
s.roadrunner.application.Timeout.TemporaryValue = 600;
If the simulation times out, the current
ScenarioSimulationobject becomes invalid. If theScenarioSimulationobject is invalid, RoadRunner generates an error if you attempt to start the simulation. To restart the simulation, delete theScenarioSimulationobject and recreate it using this code. ReplacerrSimwith the name of yourScenarioSimulationobject andrrAppwith the name of yourroadrunnerobject.delete(rrSim) rrSim = createSimulation(rrApp);
If a simulation is unresponsive, you can end the simulation by pressing Ctrl+C in the MATLAB Command Window.
For more information about simulating your scenario in RoadRunner or controlling a scenario simulation using MATLAB, see Overview of Simulating RoadRunner Scenarios with MATLAB and Simulink.