Getting Started with C2000 Microcontroller Blockset for F28M3x Concerto Processors
In this example, you will learn how to configure a simple Simulink® model to generate code for ARM® and C28x cores of Concerto® F28M3x processors and run the generated code on the board to periodically turn LEDs on and off.
C2000™ Microcontroller Blockset enables you to create and run Simulink models on Texas Instruments® C28x + ARM Cortex-M3 MCUs. The blockset includes a library of Simulink blocks for configuring and accessing F28M3x peripherals and communication interfaces.
Prerequisites
If you are new to Simulink, we recommend completing the Interactive Simulink Tutorial.
If you are new to Embedded Coder®, see the Embedded Coder product page for an overview and tutorials.
Required Hardware
For this example, you will need one of the following hardware with Texas Instruments® XDS100v2 USB Emulator connection:
F28M36 Concerto Control Card or
F28M35 Concerto Control Card
Configure the Model to Run on the ARM Cortex M3 Core of the F28M3x Processor
Open the led_blink_f28m35_m3 ARM LED model. This model is configured to run on the F28M35x ARM Cortex® M3 CPU. You can run the model on F28M36x by navigating to Configuration Parameters > Hardware Implementation > Hardware board and selecting TI Concerto F28M36x (ARM Cortex-M3).
The red LED (LD3) on the F28M35H52C control card is driven by PC7_GPIO71. In the Digital output block, set the GPIO port to GPIOC and Pin number to
7.The red LED (D2) on the F28M36P63C control card is driven by PF2_GPIO34. In the Digital output block, set the GPIO port to GPIOF and Pin number to
2.Configure the GPIOs from the Configuration Parameters > Hardware Implementation > Target hardware resources pane. By default, all pins are enabled on the C28x if not used by the ARM Simulink Model.
In Configuration Parameters > Hardware Implementation, ensure that Build action is set to Build, load and run and Boot From Flash (stand alone execution) is enabled.
Press Ctrl+B to build, load, and run the application on the hardware board. Observe that the red LED blinks once in every second.

Configure the Model to Run on the C28x CPU of the F28M3x Processor
Before running the model on the C28x CPU (RAM or Flash), configure the clock settings for the C28x CPU. You can do this by running the above ARM LED model.
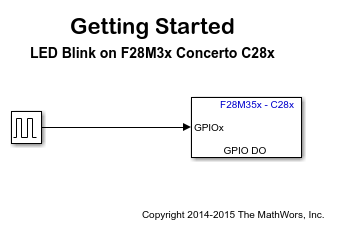
Open the led_blink_f28m35_c28 C28x LED model. This model is configured to run on the F28M35x C28x CPU. You can run the model on F28M36x by navigating to Configuration Parameters > Hardware Implementation > Hardware board and selecting TI Concerto F28M36x (C28x).
The red LED (LD2) on the F28M35H52C control card is driven by PC6_GPIO70. In the Digital Output block, set GPIO Group to
GPIO68~GPIO71and select GPIO70.The red LED (D1) on the F28M36P63C control card is driven by PE7_GPIO31. In the Digital Output block, set GPIO Group to
GPIO24~GPIO31and select GPIO31.In Configuration Parameters > Hardware Implementation, ensure that Build action is set to Build, load and run and Boot From Flash (stand alone execution) is enabled.
Press Ctrl+B to build, load, and run the application on the hardware board. Observe that the red LED LD2 on the board is ON for 0.5 second and OFF for 0.5 second.
