View Unified Verification Results in Model Testing Dashboard and in Requirements Editor
If you are working on projects-based requirements that involve test results from executed tests in Simulink® Test™, you can view the verification results as in the Model Testing Dashboard in the Requirements Editor.
If you make changes to a design requirement, the digital thread is capable of detecting such changes and determining their influence on subsequent design components and the need for retesting. You can enable the digital thread to invoke callbacks in additional tools to facilitate the creation of trace data for the resulting artifacts. To enable artifact tracing, in the Digital Thread Settings window, select Track tool outputs.
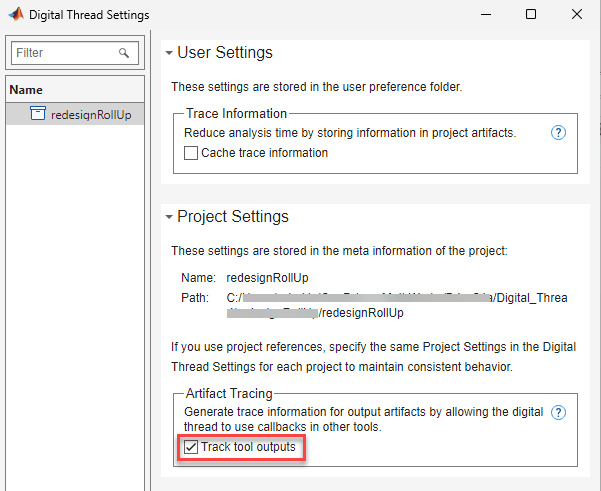
You must enable the Track tool outputs option when you work with verification results in the Requirements Editor. For more information on artifact tracing, see Enable Artifact Tracing for Project (Simulink Check).
If artifact tracing is disabled in the project, you might have to run your tests again so
that the verification results are updated. In this case, the Requirements Editor
shows a banner at the top to indicate that artifact tracing is disabled. To enable it, click
here on the banner message. If clicking on the
here in the banner message gives an error, then change the
project settings. Go to Home > Preferences > Project > File Management and select Set Writable using the file system from
the Read-only project files drop-down list.
If you cancel the artifact analysis option before it completes, the results might be stale. In this case, the Requirements Editor shows a banner at the top to indicate that artifact traceability is outdated. Click here on the banner message to resume the previous artifacts analysis operation.
To visualize unified results in Requirements Editor, follow these steps:
Add the project to MATLAB path and open it. Make sure that the project has a requirements set with Simulink test file associated with it.
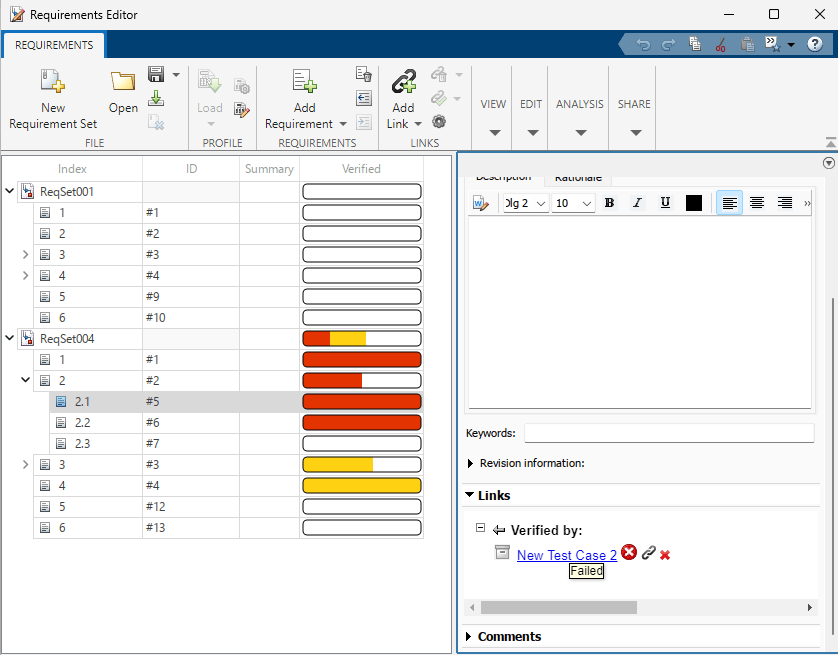
Open Requirements Editor. In the Requirements Editor, select
 Columns > Verification Status.
Open Simulink Test Manager and run the tests by clicking Run.

The Requirements Editor automatically displays the verification results for the tests. Go to Requirements Editor and view the verification results.
Considerations
To fully leverage the capability of the unified verification status while working with test and result files, keep these considerations in mind:
If you modify an existing test file and save it in Simulink Test Manager, Requirements Editor displays stale results when you click Refresh. Run the tests again in Simulink Test to view the updated verification results in the Requirements Editor.
If you export the results file before deleting the same results file from the Test Manager, Requirements Editor is able to display the last updated results.
You must export a result file only after enabling the Track tool outputs option.
Verification results cannot be retrieved when you work with main and reference projects and move the exported result file manually to either main or any of the reference projects.
See Also
Apps
- Requirements Editor | Model Testing Dashboard (Simulink Check)