Customize Chapter Page Headers
This example shows how to customize chapter page headers that are generated by the Report API chapter reporter. You can customize chapter page headers for PDF and Microsoft® Word reports. The example generates a report for a fictitious company, ABC Services. The custom header contains the company logo, project name, and report date.

The company logo is fixed in the header. The project name and report date are dynamic. They are created when the report is generated.
The workflow is:
Create a custom chapter reporter class.
Modify the headers in the PDF or Word chapter template.
Add properties to the custom reporter class for the dynamic content in the custom headers.
Write a report program that uses the custom reporter and specifies values for the properties.
Create a Custom Chapter Reporter Class
Create a skeleton chapter reporter class by calling the mlreportgen.report.Chapter.customizeReporter method. Name the class Chapter and save it in a class folder inside of a namespace folder.
mlreportgen.report.Chapter.customizeReporter('+abc/@Chapter');This method call also copies the chapter template for each report type to the +abc/@Chapter/resources/templates folder.
Modify the Headers in the Chapter Template for a PDF Report
To modify the header definitions in the chapter template for a PDF report:
Unzip the template file.
Edit the header definitions in the
docpart_templates.htmlfile using a text editor.Package the extracted files into the template file.
Unzip the Template File
Change the current folder to the folder that contains the PDF template file, default.pdftx and then unzip the file.
cd('+abc/@Chapter/resources/templates/pdf');
unzipTemplate('default.pdftx');
The extracted files are in a folder named default.
Copy the Image File
Copy the image file for the company logo to the default/images folder. Use the image file, abc_logo.png, attached to this example, or your own image file.
Edit the Header Definitions
In the MATLAB® editor or a text editor, open docpart_templates.html, which is in the folder named default.
To make the headers the same on all pages, in the Section1 dptemplate element, delete SectionFirstPageHeader and SectionEvenPageHeader from the list of header and footer templates.

SectionDefaultPageHeader is now the template for all chapter page headers. Find the SectionDefaultPageHeader template.
<dptemplate name = "SectionDefaultPageHeader">
     <p class="SectionTitleHeader"><StyleRef style-name="SectionTitle1"/></p>
     <hr/>
</dptemplate>
Replace it with this markup:
<dptemplate name = "SectionDefaultPageHeader">
    <table width="100%">
        <tr style="border-bottom: 1pt solid #ccc;">
            <td style="text-align:left; padding-bottom:2pt" valign="bottom">
                <img src="images/abc_logo.png"></img></td>
            <td style="text-align:center; padding-bottom:2pt; font-family:arial;
                font-size: 10pt; font-weight: bold" valign="bottom">
                <hole id="Project">PROJECT</hole></td>
            <td style="text-align:right; padding-bottom:2pt; font-family:arial;
                font-size: 10pt" valign="bottom"><hole id="Date">DATE</hole></td>
         </tr>
     </table>
</dptemplate>
The markup defines a one-row, three-column table with these characteristics:
The table cells contain the company logo, a hole for the project name, and a hole for the report date.
The contents of the first, second, and third cells are left-aligned, center-aligned, and right-aligned, respectively.
The padding between the bottom of the cell and the cell contents is 2pt.
The cell contents are aligned with the bottom of the cell.
The font for the text in the second cell is Arial, 10pt, and bold. The font for the text in the third cell is Arial and 10pt.
The bottom border of the row is visible. The table does not have borders because the HTML does not specify the
borderproperty.
Package the Extracted Files
If you edited docpart_templates.html in the MATLAB Editor, close the file before you package the files.
Make sure that you are in the +abc/@Chapter/resources/templates/pdf folder, which contains the folder named default. Package the files in default back into the original PDF template file.
zipTemplate('default.pdftx','default');
Modify the Headers in the Chapter Template for a Word Report
In Word, the Section1 template is used for chapters and top-level sections. The template is in the Quick Parts gallery.
To modify the headers in the Section1 template:
Open the template file in Word.
Create a temporary copy of the Section1 template in the body of the template document.
Specify whether all pages have the same header.
Edit the headers.
Save the modified Section1 template to the Quick Parts gallery.
Delete the content from the body of the template document and save the template file.
Open the Template File
Navigate to +abc/@Chapter/resources/templates/docx.
Open the template file by using one of these methods:
In MATLAB, in the Current Folder pane, right-click the template file and click Open Outside MATLAB.
Outside of MATLAB, right-click the template file and click Open.
Do not double-click a Word template file to open it. Double-clicking the file opens a Word document file that uses the template.
The template document opens to an empty page.
Display Formatting Symbols
To make paragraph and formatting symbols visible, on the Home tab, click the Show/Hide button ![]() .
.
Copy the Section1 Template into the Template Document
On the Insert tab, in the Text group, click Quick Parts, and then click the Section1 building block.
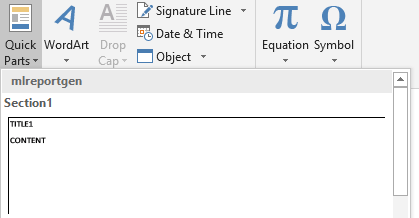
In the template document, Word inserts a copy of the Section1 template and a dummy Section2 section. The dummy section is ignored when you generate a report.

The cursor is in the dummy Section2. Scroll up to the Section1 template. To open the header, double-click it.

Specify That All Pages Have the Same Header
Under Header and Footer Tools, on the Design tab, clear the Different First Page check box.

The header for pages that follow the first page is copied to the first page header.

Add a Table to the Header
On the Insert tab, Click Table. Move the pointer over the grid until you highlight three columns and one row.

Delete the message Error! No text of specified style in document and the paragraph that contains it.
The horizontal rule from the original header is the bottom border of a paragraph. To make it invisible, click the paragraph and then, on the Home tab, in the Paragraph group, click the arrow to the right of Borders ![]() and then click No Border.
and then click No Border.
Add the Logo to the First Table Cell
Copy and paste the company logo into the first table cell. Use the attached abc_logo.png file or your own image file.
Add Holes for the Project and Date
If the Developer ribbon is not available, click File > Options, and then click Customize Ribbon. Under Customize the Ribbon, select Developer.
On the Developer tab, click Design Mode so that you can see hole marks with the title tag when you create a hole.

In the second cell, add a few spaces before the entry mark so that the hole that you add is an inline hole.
Click in front of the spaces.
Click the Rich Text Content Control button ![]() . A rich text content control displays.
. A rich text content control displays.

Delete the spaces that you added.
Replace the text in the control with text that identifies the hole, for example, Project Name.
On the Developer tab, click Properties.
In the Content Control Properties dialog box:
in the Title field, enter
Project.In the Tag field, enter
Hole.

Select the Use a style to format text typed into the empty control check box. Then, click New Style.
In the Create New Style from Formatting dialog box, enter Project in the Name field. For the formatting, specify Arial, 10pt. Click the Bold button. Click OK.

In the Content Control Properties dialog box, click OK.
Add an inline hole for the date in the third cell. Use the steps that you used to add a hole to the second cell.
Add a few spaces before the entry mark.
Click in front of the spaces.
Click the Rich Text Content Control button
 .
.Delete the spaces that you added.
Replace the text in the control with text that identifies the hole, for example, Report Date.
On the Developer tab, click Properties. In the Content Control Properties dialog box, enter
Datein the Title field andHolein the Tag field.Select the Use a style to format text typed into the empty control check box. Then, click New Style.
In the Create New Style from Formatting dialog box, enter ReportDate in the Name field. For the formatting, specify Arial and10pt.
The table looks like:

Specify the Table Cell Bottom Margin
To specify the cell bottom margin:
Select and right-click the table.
Click Table Properties, then on the Table tab, click Options.
In the Table Options dialog box, under Default cell margins, in the Bottom field**,** enter 2pt.

Align the Cell Contents
Left-align the logo in the first cell. Center the hole in the third cell. Right-align the hole in the third cell.
To align cell contents:
Select the image or hole in the table.
On the Home tab, in the Paragraph group, click the Align Left, Center, or Align Right button.

Make the Top and Side Borders of the Table Invisible
To display only the bottom border of the table:
Select the table.
Under Table Tools, on the Design tab, click Borders > No Border.
Click Borders > Bottom Border.
Set the Line Weight to 1pt.

Save the Custom Template
Close the header by double-clicking the page outside of the header.
To select all of the content in the template, press Ctrl+A.
On the Insert tab, click Quick Parts, and then click Save Selection to Quick Parts Gallery.
In the Create New Building Block dialog box, in the Name field, enter Section1. Set Gallery to Quick Parts, Category to mlreportgen, and Save in to default. Click OK.

When you see the message Do you want to redefine the building block entry?, click Yes.
Save the Template File
It is a best practice to delete the content from the body of the template document before you save the template file.
With the content selected, press Delete.
To hide the formatting symbols, on the Home tab, in the Paragraph group, click the click the Show/Hide button ![]() .
.
Save the template file.
Add Properties to the Custom Reporter Class
Because the custom header has holes for dynamic content, you must define properties for the holes.
Navigate to the +abc/@Chapter folder.
In the class definition file, Chapter.m, add the properties that correspond to the Project and Date holes in the header. Replace the empty properties section with:
    properties
        Project = ''
        Date = ''
    end
Save the class file.
Generate the Report Using the Custom Chapter Reporter
When you generate the report, create the chapter reporter from the abc.Chapter class. Assign values to the properties that correspond to the holes in the header.
Before running the following code, navigate to the folder that contains the +abc folder. Alternatively, to add the folder that contains the +abc folder to the MATLAB path:
In the MATLAB Toolstrip, on the Home tab, in the Environment group, click Set Path.
In the Set Path dialog box, click Add Folder.
In the Add Folder to Path dialog box,click the folder and then click Select Folder.
You cannot add namespaces to the MATLAB path. Add the folder that contains the namespace folder.
Generate a PDF Report
import mlreportgen.dom.*
import mlreportgen.report.*

report = Report("Consulting Report","pdf");
chapter = abc.Chapter();
chapter.Project = "Control Systems Consulting";
chapter.Date = date;
chapter.Title="Overview";
add(chapter,"Chapter content goes here.");
add(report,chapter);
close(report);
rptview(report);
Generate a Word Report
import mlreportgen.dom.*
import mlreportgen.report.*

report = Report("Consulting Report","docx");
chapter = abc.Chapter();
chapter.Project = "Control Systems Consulting";
chapter.Date = date;
chapter.Title="Overview";
add(chapter,"Chapter content goes here.");
add(report,chapter);
close(report);
rptview(report);
See Also
mlreportgen.report.Chapter | unzipTemplate | zipTemplate