RoadRunner Scenario Fundamentals
RoadRunner Scenario is an interactive editor that enables you to design scenarios for simulating and testing automated driving systems. You can place vehicles, define their paths and interactions in the scenario, and then simulate the scenario in the editor. You can also generate multiple variations of scenarios programmatically, export them to ASAM OpenSCENARIO®, and simulate and visualize them in automated driving simulators and players.
If you design an actor with autonomous behavior in an external simulator such as CARLA, you can assign that actor behavior to a vehicle in your scenario. You can then cosimulate that actor in RoadRunner Scenario and the external simulator. You can also cosimulate actors designed in MATLAB® and Simulink® and analyze simulation results using MATLAB and Simulink tools.
Scenes vs. Scenarios
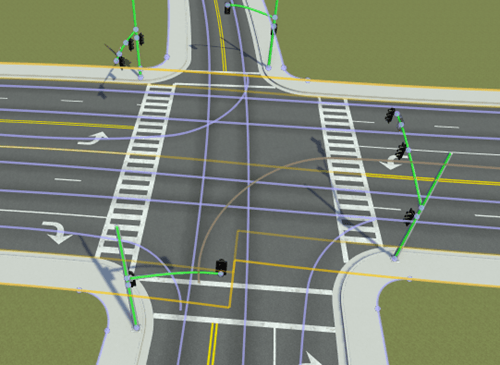
RoadRunner Scenario is an add-on product that requires an addition to your RoadRunner license. The RoadRunner base product enables you to design scenes, which are composed of static elements, such as roads, lanes, terrain, and traffic signals. This figure shows a sample intersection scene with the static elements that you can edit.
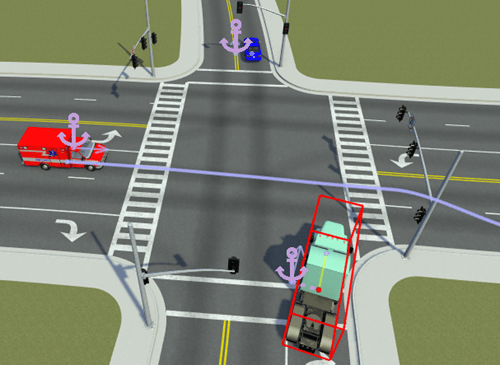
RoadRunner Scenario enables you to design scenarios, which are composed of dynamic elements such as moving vehicles. Scenarios are built on top of scenes: to create a scenario, you must first create a scene. This image shows a sample scenario built off of the scene from the previous image.
In RoadRunner, only the static elements are visible and editable. In RoadRunner Scenario, the scene is visible but only the dynamic elements are editable. To switch between scene and scenario editing, use the Scene Editing (RoadRunner) and Scenario Editing (RoadRunner Scenario) toggle in the upper-right corner of the application.
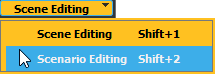
This toggle is available only if you have a RoadRunner Scenario license. Otherwise, RoadRunner is by default in scene editing mode.
Design and Simulate Scenarios
In RoadRunner Scenario, the scenarios you design are composed of actors, which are the objects in motion within a scenario. Vehicles are one type of actor and a key component of driving scenarios. The Vehicles folder of the Library Browser contains a variety of vehicle assets that you can drag into your scenario.

By selecting an actor and right-clicking within the scenario, you can define paths for the vehicle to follow. By default, paths snap to lanes, enabling you to quickly create complex paths such as turns and lane changes. For additional flexibility, you can change the shape of paths by modifying tangent waypoints, shift paths laterally within a lane, and specify free-form paths that go off-road or disobey traffic laws.
If you do not specify a path, then actor fall back on their built-in behavior, which for vehicles added to roads is to drive in their current lane at a constant speed.
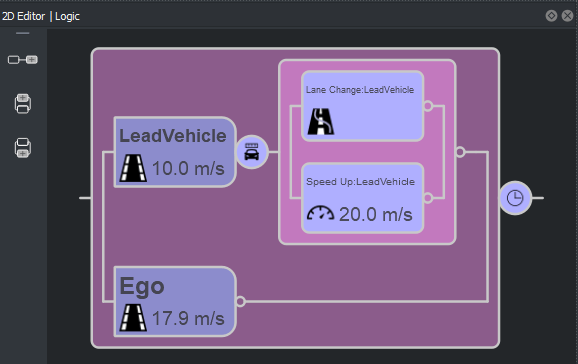
To define the interactions between actors, you use the graphic Logic editor, which is available in the 2D Editor pane.
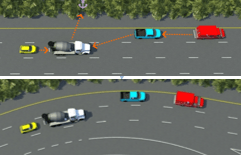
The scenario logic defined in this editor consists of a series of actions with optional conditions that trigger those actions. Actions and conditions can also occur in parallel, enabling you to build complex scenarios containing multiple actors that have different goals. For example, this sample logic scenario shows a vehicle changing lanes and changing speeds when it reaches a certain distance from another vehicle.
To test your scenarios, RoadRunner Scenario provides an in-editor simulation tool. From the toolbar, select the Simulation Tool to enable simulation controls. Using the controls in the Simulation pane, you can control the pacing and step size of the scenarios.
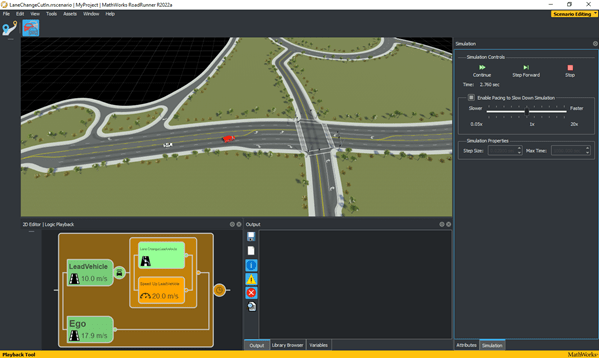
During the design and simulation process, RoadRunner Scenario provides validation feedback on your scenarios. This feedback comes in the form of visual indicators while designing and reports in the Output pane after simulation. Use this validation feedback to fix validation errors early, instead of waiting to catch them during the more time-consuming export process.
Export and Import Scenarios
After you design your scenario, you can export it to a supported format such as ASAM OpenSCENARIO XML and DSL. You can use these exported scenarios in automated driving simulators and players. For example, this figure shows a visualization of a scenario exported to ASAM OpenSCENARIO XML 1.0 in esmini.
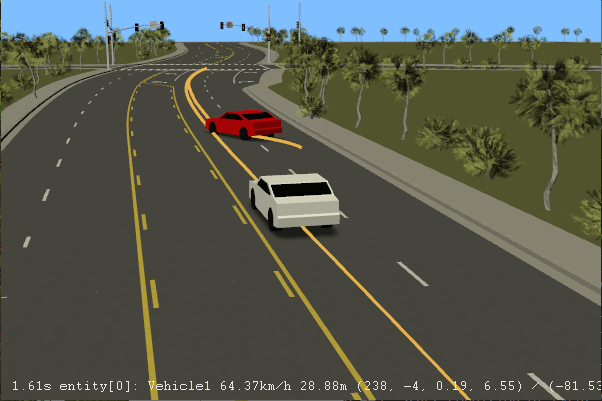
If you have scenarios defined in supported formats such as ASAM OpenSCENARIO XML 1.0, you can import those scenario files into RoadRunner Scenario, modify the scenarios in the editor, and then re-export them.
You can export and import files interactively or programmatically. Using either MATLAB functions or a language-neutral API built on gRPC® technology, you can programmatically export or import hundreds of files in the language of your choice. Use of the MATLAB functions requires Automated Driving Toolbox™.
Generate Scenario Variations
By taking a single scenario and varying certain aspects of it programmatically, you can quickly generate and export hundreds or even thousands of scenarios on which to test autonomous vehicle algorithms. For example, you can vary the distances between vehicles in a scenario, or vary vehicle speeds, colors, or types.
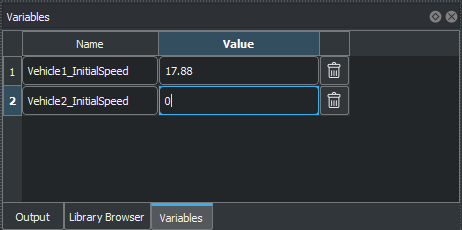
To create a variable, right-click a scenario attribute in the Attributes pane and select Create Variable. For example, this figure shows a vehicle speed variable being created.
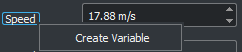
These values appear in the Variables pane.
You can then modify these variables using the RoadRunner gRPC API or corresponding MATLAB functions (requires Automated Driving Toolbox) and export multiple variations of a scenario programmatically.
You can also vary scenarios by relocating them within a scene. The anchoring system used in RoadRunner Scenario makes it easy to relocate scenarios. By dragging an anchor point around in a scenario, all objects anchored to that point move with it.
In a scenario, an anchor can be:
A point on a road or junction.
A point specifying the location of an actor.
A path waypoint.
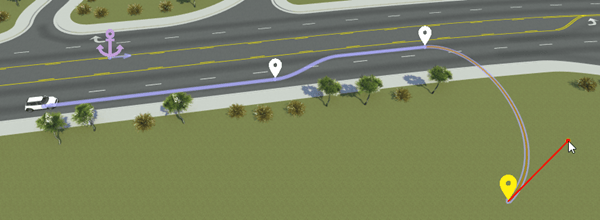
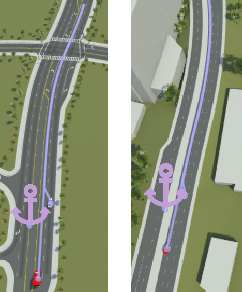
You can assign an anchor to any object in a scenario. For example, this figure shows vehicles anchored to each other, with all vehicles anchored directly or indirectly to a road anchor in lavender.

Move objects, such as vehicles, relative to each other, either along lanes or into different lanes.
Move an entire scenario to a new scene location by dragging a single anchor point.
Quickly change the travel directions of all vehicles in a scenario.
Align vehicles with each other or with an anchor point.
Change the shape of a road while having vehicles maintain their relative positions.
If multiple scenes have a road anchor with the same name, you can also relocate an scenario into an entirely new scene. In each scene, the scenario is positioned relative to the road anchor.
RoadRunner provides both interactive and programmatic ways to relocate scenes within scenarios. Using the programmatic option, you can quickly generate a scenario from multiple scenes.
Simulate Actors with MATLAB and Simulink
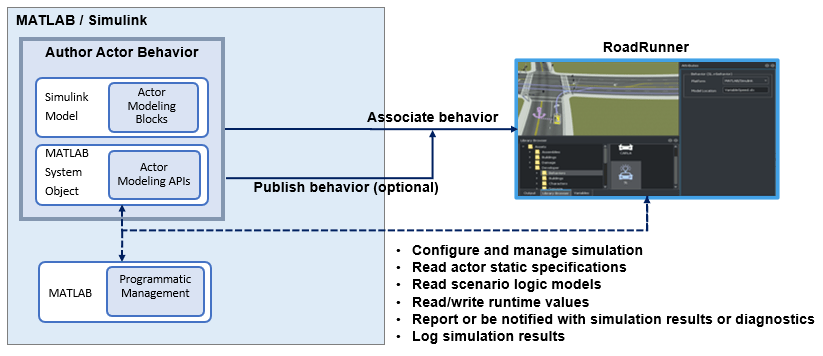
You can author RoadRunner actors using MATLAB System object™ and Simulink, associate actor behavior in RoadRunner scenario, and simulate the scenario.
These are the steps of the workflow for simulating RoadRunner Scenarios with MATLAB and Simulink:
Author MATLAB System objects or Simulink models to define actor behavior.
Associate actor behavior in RoadRunner.
Optionally, publish an actor behavior.
Tune the parameters defined in MATLAB or Simulink for RoadRunner simulations.
Simulate a scenario using the RoadRunner user interface or control simulations programmatically from MATLAB.
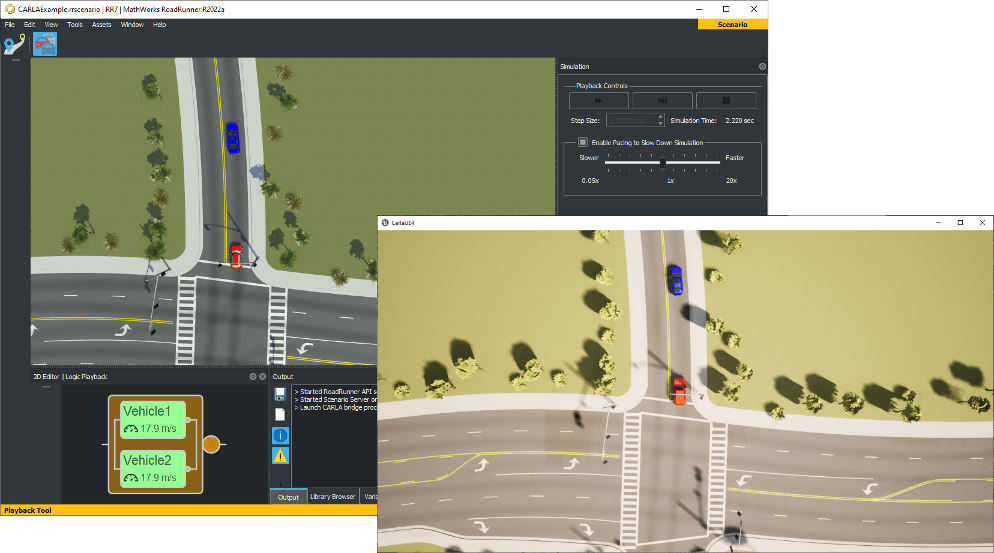
Cosimulate Actors with CARLA
You can cosimulate a scenario in RoadRunner Scenario and in an external simulator, such as CARLA. Using an external simulator, you can control vehicle actors to test your automated driving algorithms.
See Also
Scenario Edit Tool | Simulation Tool | Vehicle Assets