Compare Images Using Custom Image Comparison Tool
R2026bThis example shows how to use ImageComparisonTool, a custom image comparison tool, to compare two images side by side with synchronized zoom and pan interactions. ImageComparisonTool is an UI component built using the App Designer. You can also
Update the component properties dynamically.
Embed the component in a UI figure, use UI control callbacks to apply image-processing operations, and dynamically update the displayed images.
Create an ImageComparisonTool UI component and assign it to a variable to configure its properties. The component displays two image viewers with a control bar that provides these interactive controls:
Linked Viewers check box — Synchronize zoom and pan between both viewers
Swap Images button — Swap the images displayed in the left and right viewers
Reset Views button — Restore both viewers to display the full image after zooming or panning
comp = ImageComparisonTool
comp =
  ImageComparisonTool with properties:

           Image1: []
           Image2: []
    LinkedViewers: on
           Title1: "Image 1"
           Title2: "Image 2"
         Position: [0 0 1 1]

  Show all properties
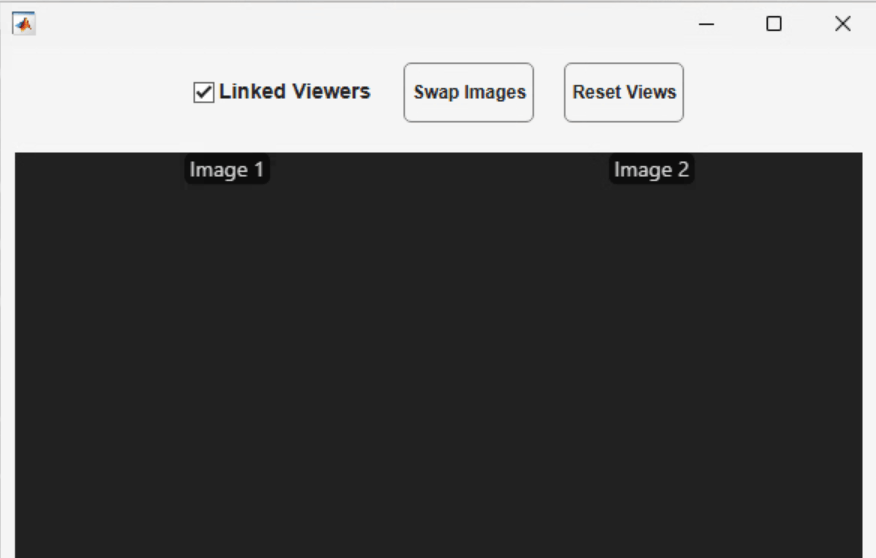
The ImageComparisonTool component has these configurable properties:
Image1— Image displayed in the left viewer, specified as a grayscale or truecolor numeric arrayImage2— Image displayed in the right viewer, specified as a grayscale or truecolor numeric arrayLinkedViewers— Synchronize zoom and pan between viewers, specified as a logical value or"on"or"off"Title1— Title text for the left viewer. The default value is"Image 1"Title2— Title text for the right viewer. The default value is"Image 2"Position— Location and size of the component in its parent window, specified as a four-element vector of the form [left bottom width height]
You can specify these properties as name-value arguments during construction or use dot notation after construction.
Load and Display Images
Read a grayscale image and generate a variant of the image by rotating it.
image1 = imread("cameraman.tif");
image2 = imrotate(image1,5,"bicubic","crop");
Assign the images and custom titles to the viewers. Use the interactive controls to zoom and pan either image. When LinkedViewers is enabled, both viewers update simultaneously.
comp.Image1 = image1;
comp.Image2 = image2;
comp.Title1 = "Original";
comp.Title2 = "Processed";
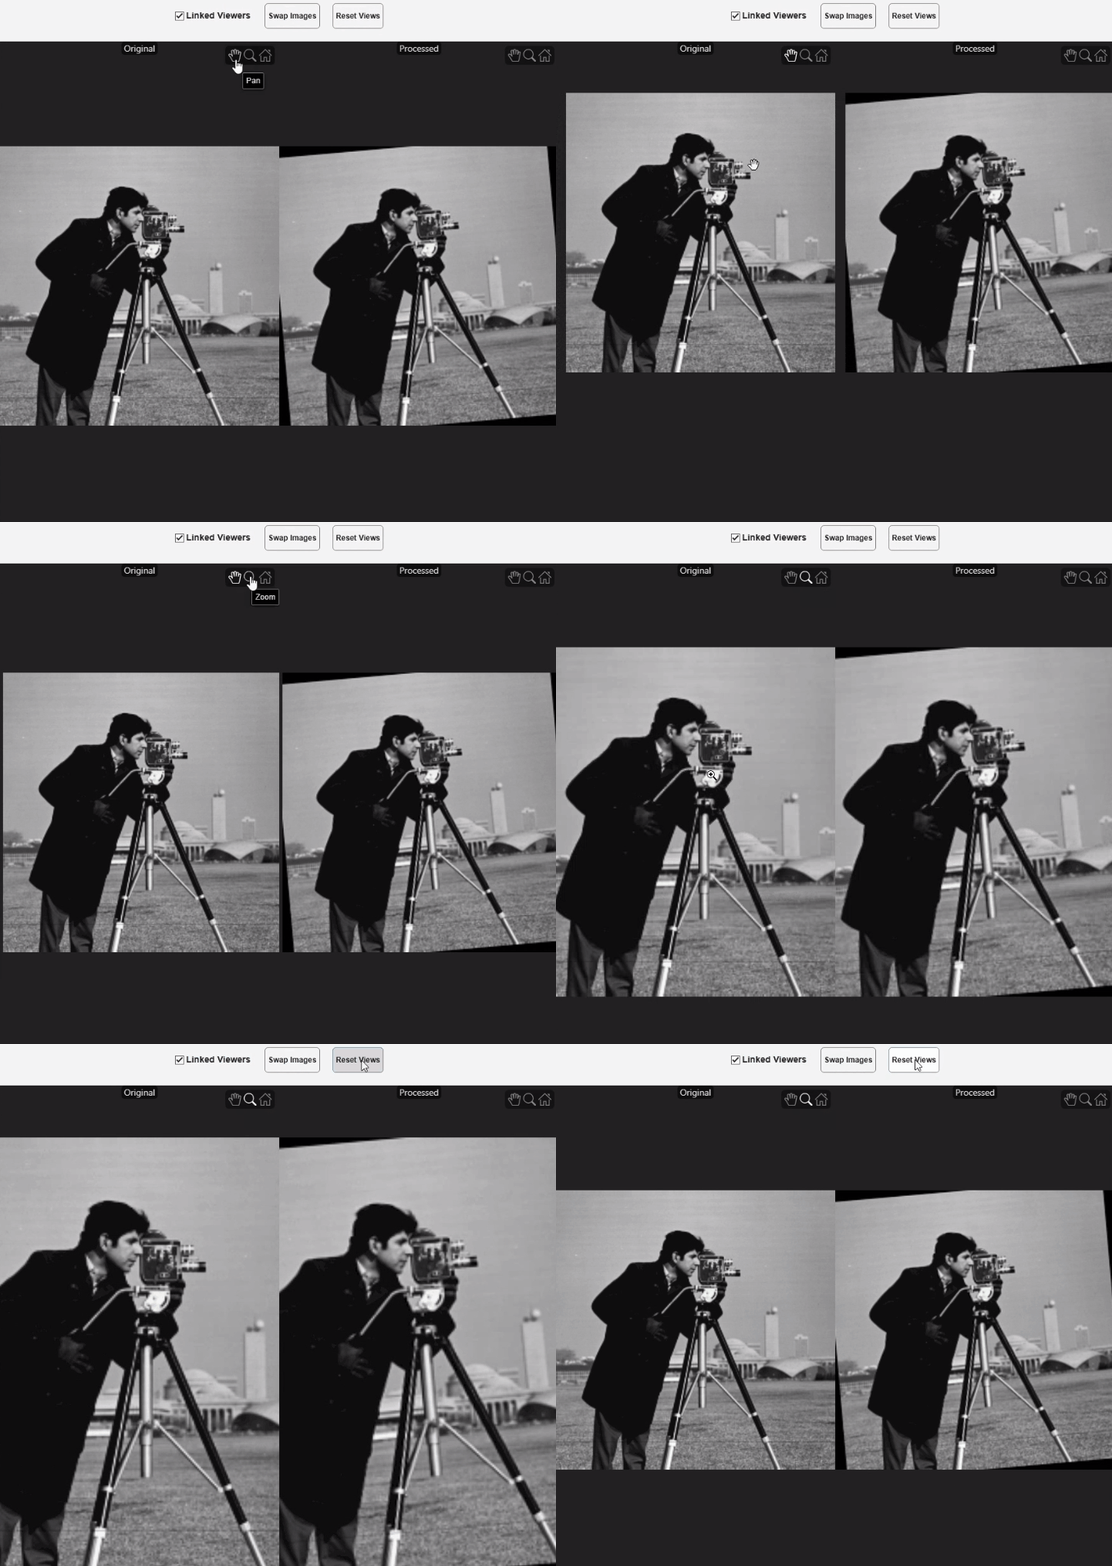
Alternatively, you can create the component and set all properties during construction by using name-value arguments.
comp = ImageComparisonTool(Image1=image1,Image2=image2,Title1="Original",Title2="Processed");
Resize Display Window
Adjust the size and location of the viewer and the interactive controls by setting the Position property. The value is a four-element vector of the form [left bottom width height] in normalized units. The value [0 0 1 1] fills the entire figure.
comp.Position = [0 0 1 0.8];
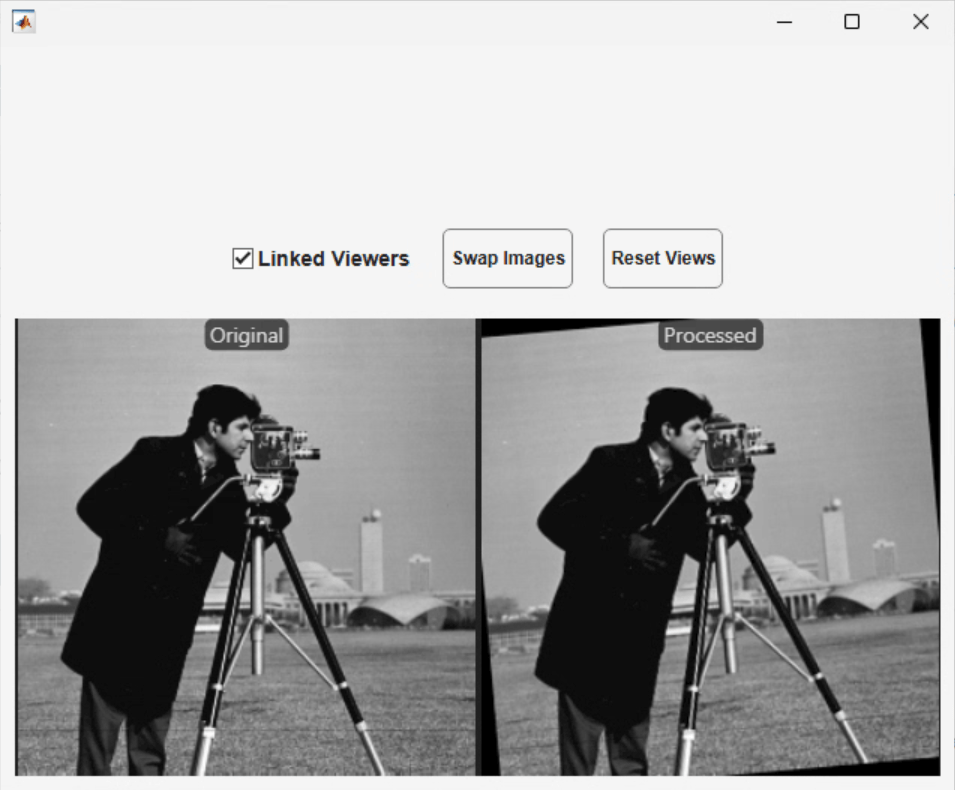
Reset the Position property to its default value.
comp.Position = [0 0 1 1];
Update Image Data and Titles
Enhance the contrast of the input image by using histogram equalization, then compare it against the original. Assign new image data and titles to update the display.
enhanced = histeq(image1);
comp.Image2 = enhanced;
comp.Title2 = "Histogram Equalized";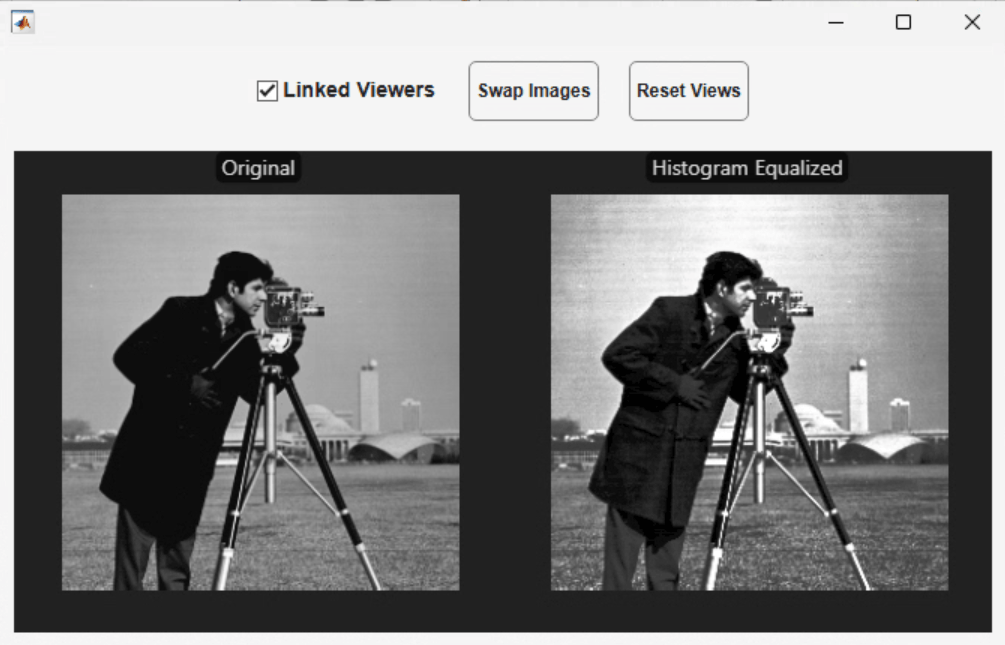
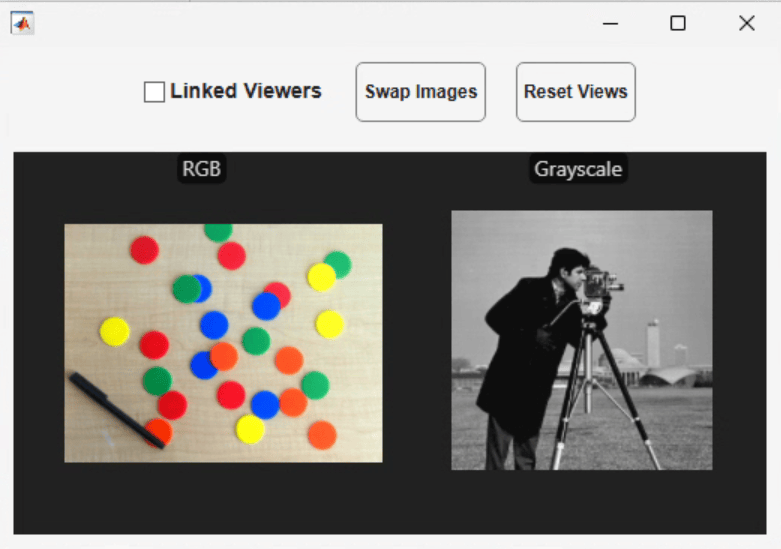
Display Color and Grayscale Images
The component supports displaying RGB and grayscale images simultaneously in the same window. Create a new ImageComparisonTool component and specify image data and titles as name-value arguments during construction. To navigate each viewer independently, set the LinkedViewers property to "off".
rgb = imread("coloredChips.png");
gray = imread("cameraman.tif");
comp2 = ImageComparisonTool(Image1=rgb,Image2=gray,Title1="RGB",Title2="Grayscale",LinkedViewers="off");
Embed Component in UI Figure for Filtering Workflows
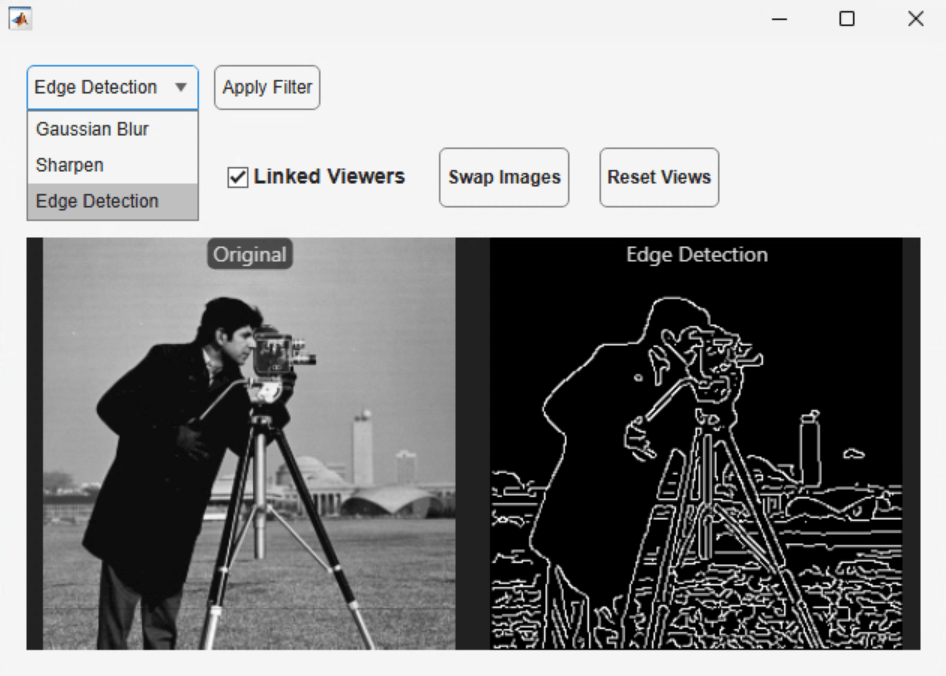
To create a custom workflow, embed the ImageComparisonTool in an UI figure alongside other controls. This example adds a filter selection drop-down and an Apply Filter button above the component. The helperApplyFilter function processes the image based on the selected filter and updates the component.
Create an UI figure with a grid layout that has two rows. The first row contains the controls, and the second row contains the component.
fig = uifigure(Position=[200 200 1100 900]);
gl = uigridlayout(fig,RowHeight={40,'1x'},ColumnWidth={'1x'});
Add a control panel with a drop-down for filter selection. This example uses three filters: Gaussian blur, sharpening, and Canny edge detection.
controlPanel = uigridlayout(gl,RowHeight={'1x'},ColumnWidth={'fit','fit'},Padding=[10 5 10 5]);
dd = uidropdown(controlPanel,Items=["Gaussian Blur","Sharpen","Edge Detection"],Value="Gaussian Blur");
Embed the ImageComparisonTool in the second row by specifying the grid layout as the parent.
comp3 = ImageComparisonTool(Image1=image1,Image2=image1,Title1="Original",Title2="Filtered",LinkedViewers=true,Parent=gl);
Add a button that applies the selected filter and updates the component.
btn = uibutton(controlPanel,Text="Apply Filter",ButtonPushedFcn=@(~,~)helperApplyFilter(dd,comp3));Select a filter from the drop-down and click Apply Filter to update the right viewer with the processed result.
Customize Component in App Designer
You can modify the ImageComparisonTool UI component by opening it in App Designer. The App Designer provides two views: Design View, which displays the component layout, and Code View, which contains the source code of the component.
Use Design View to adjust the layout, add new UI elements, or rearrange existing controls.
Use Code View to inspect and modify the component implementation code.
The component is stored as a .mlapp file, and you can export the component implementation to a MATLAB code file (.m). Open the ImageComparisonTool UI component in App Designer by running this command in the Command Window:
appdesigner("ImageComparisonTool")
Helper Functions
The helperApplyFilter function supports the filtering workflow by applying the selected filter to the original image and updating the comparison tool.
function helperApplyFilter(dd,comp)
switch dd.Value
    case "Gaussian Blur"
        comp.Image2 = imgaussfilt(comp.Image1,2);
    case "Sharpen"
        comp.Image2 = imsharpen(comp.Image1);
    case "Edge Detection"
        comp.Image2 = uint8(255*edge(im2gray(comp.Image1),"canny"));
end
comp.Title2 = dd.Value;
end
See Also
Apps
Properties
Functions
imageshow|edge|imgaussfilt|imsharpen|uifigure|uilabel|uigridlayout|uidropdown|imrotate|histeq|uibutton

