Fit a Tire Model to Tire Measurement Data
Use the Tire Manager app to fit tire model parameters to tire measurement data. In this example, you fit a Magic Formula 6.2 tire model to tire data. This example uses the edited tire data from Import Tire Measurement Data for Analysis. A copy of the data is provided.
Download Edited Example Tire Data
The edited_tire_data folder contains the tire data files to import to the Tire Manager app.
Launch Tire Manager
Open the Tire Manager app in MATLAB®. On the Apps tab, under Automotive, click the Tire Manager icon. Alternatively, enter this command in the MATLAB Command Window.
tireManager
Import Tire Data
Import the edited tire data.
Navigate to the Main tab in the Tire Manager toolstrip and click Import.
To import data files from a folder, click Import Data from Folder.
Select the
edited_tire_datafolder to import.Select the
Datafolder in the Workspace tree.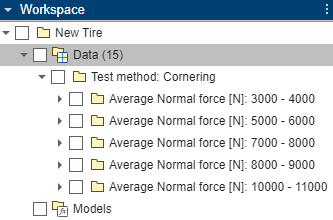
Fit Tire Model
Fit a tire model to the edited tire data.
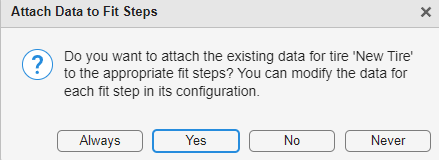
Click New Fit. Then, click Fit New MF 6.2 Tire Model.
The Attach Data to Fit Steps dialog box opens. To attach the tire data to the appropriate fit steps, click Yes. For more information on what data is required for each fit step, see fitType.
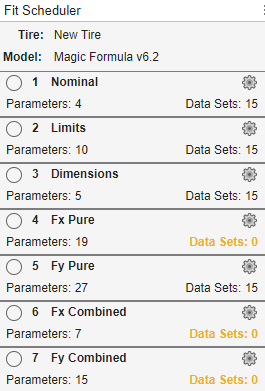
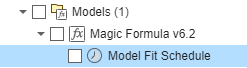
The Fit Scheduler opens with data configured to each fit step. Fit steps where the data sets had no data that applied to the fit step are highlighted in yellow.
To edit a fit step, click the gear
 icon. You can adjust parameter values,
edit lower and upper bounds of a parameter, and change the selection of
parameters to use for model fitting. Additionally, if a parameter is defined
in multiple fit steps, a warning appears in the
Parameters table.
icon. You can adjust parameter values,
edit lower and upper bounds of a parameter, and change the selection of
parameters to use for model fitting. Additionally, if a parameter is defined
in multiple fit steps, a warning appears in the
Parameters table.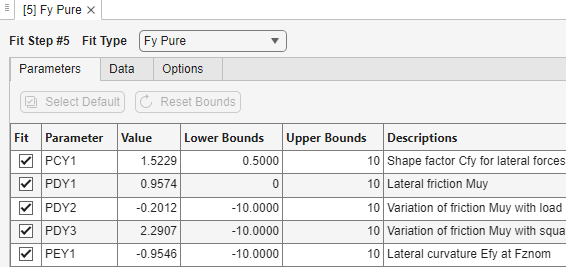
The Fit Model tab opens. To fit the tire model, click Fit All. A clock icon appears next to the fit schedule object in the Workspace tree, indicating the fit is in progress.
Inspect Tire Model Fit
Inspect and visualize the fitted tire model to determine whether the results look as
expected. After the fit is completed, the icon changes to indicate the overall status of
the fit. In this example, since not all fit steps had data associated with them, the fit
icon changes to a yellow icon, indicating the fit completed successfully with warnings.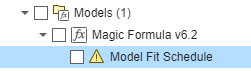
Inspect each fit step by reviewing the icon indicators. Green icons indicate the fit step completed without errors. Yellow icons indicate a warning that the fit could not be started, for example, if data was not configured for the fit step. Red icons indicate that the fit started but then failed due to an error. In this example, the fit steps that had data associated with them completed without errors while the fit steps without associated data completed with a warning.

Inspect the individual fit steps that display a warning.
Click on the yellow icon for more information. In this example, the warning appears because data was not configured for the fit step.
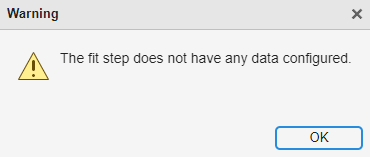
These warnings are expected, because the tire data is from slip angle sweeps and only applies to a subset of the fit steps.
You can visually inspect each fit step that completes without warning or error by clicking the View Fit Results
 button in the successfully completed fit
step. For example, if you view the results for the Fy
Pure fit step, the plot shows that the model fits the data
well.
button in the successfully completed fit
step. For example, if you view the results for the Fy
Pure fit step, the plot shows that the model fits the data
well.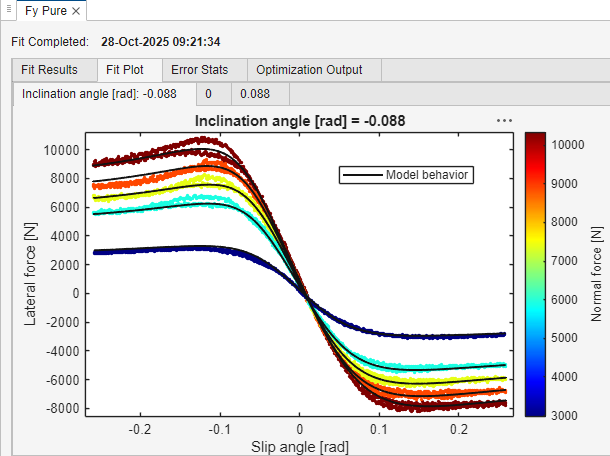
See Also
tireData | tireData.import | tireModel | tireModel.new | tireModel.import | fit